Hunting for Malicious Binaries and Backdoors in the Running Containers
An attacker might exploit one of the container's service and install malicious apps or a backdoor to get access to your container later. In this post, you'll learn how to use the "docker diff" plugin to do forensics and incident response on a running docker container.


Hello World! Let's say your containers are compromised and adversaries have left a backdoor on it or malware that could be a miner or anything. You got to know via system logs because of unusual activities and spikes in container usage and unfortunately, there is no further monitoring implemented via tools like ELK stack and Wazuh.
Now how would you confirm the breach, find the malware and kill it? Yeah, killing container and starting a new one from the legit image makes sense. But if you are from an infosec background, you won't do that, instead, find the malware in the container, kill it, and later dissect it to learn more about its behavior.
In this post, I will be discussing the following two labs with you that will cover the answers to the following questions.
Identifying the Backdoor User
In this lab, you are on the host machine and got to know that an attacker has compromised your running WordPress container. You need to identify the changes made in the container. We have seen in the Analyzing Docker Image for Retrieving Secrets post the container-diff tool depends on the exported image file (tar archive), and the catch is you are supposed to do it in the running container.
As you can see the docker container is running without any checkpoint which means that this is the container that is compromised.

wordpress is running with no checkpointsThe docker diff plugin is used to check the file changes made in the container since its creation. It comes with the docker client so you don't have to set it up. It gives you the mode of action and file name which means the following:
A /path/to/file means that the file has been added
C /path/to/file means that the file has been modified
D /path/to/file means that the file has been deleted
Now, if you want to get these changes, simply call docker diff wordpress command, it will give you a suspicious entry C /etc/shadow. Shadow file in Linux is the Database of the usernames and passwords and is very unlikely to be changed in the container.
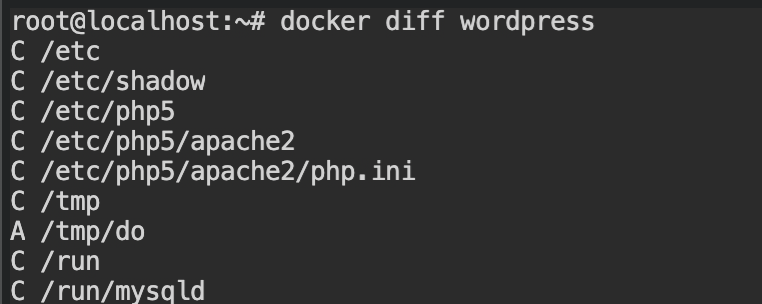
docker diffNote: Changes made while creating images from Dockerfile instructions will not be tracked by the docker diff. For that you need to use container-diff analyze tool
Copy the file from the container using docker cp wordpress:/etc/shadow shadow.new and start the container with the original image to save the shadow file from that container as shadow.old file.
To find the changes between this file, you can use the diff command which will give you the following output.
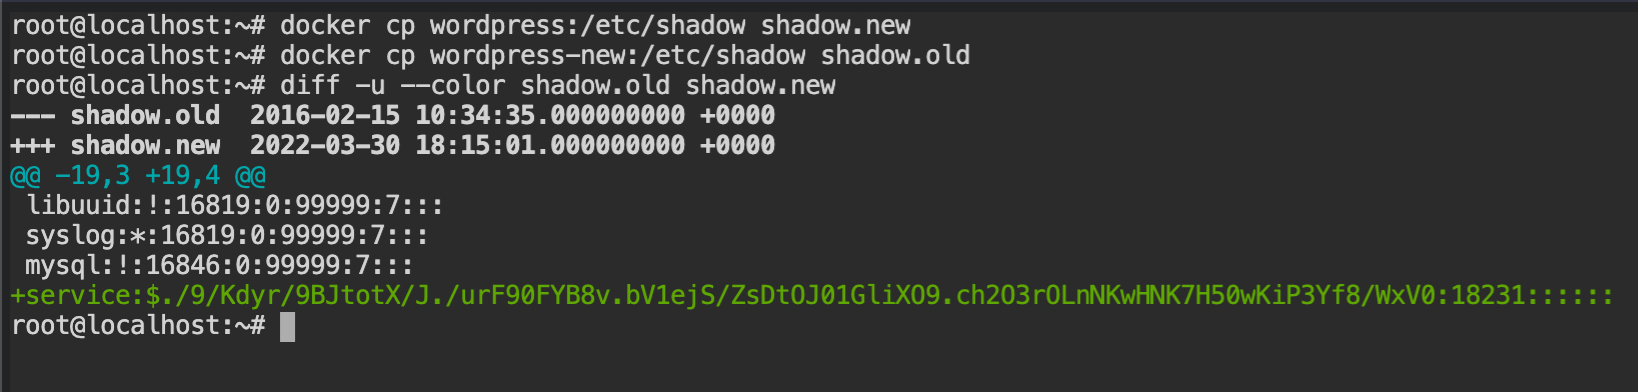
Finally, we found that the attacker is using service account as a backdoor to login into the system.
Hunting for Malicious Binaries
This lab is more interesting as it requires some knowledge of GDB and Linux. Anyways, in this lab, the attacker has compromised a running WordPress docker container and added a backdoor. You have root access to the host machine. You are supposed to find the remote host backdoor is trying to reach.
As you can see the wordpress container is the only one that is running, therefore it is the one that is compromised.

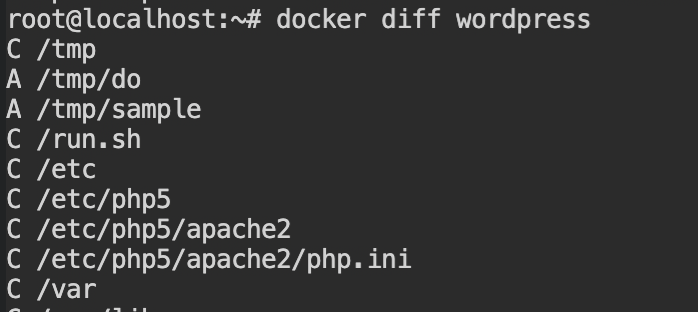
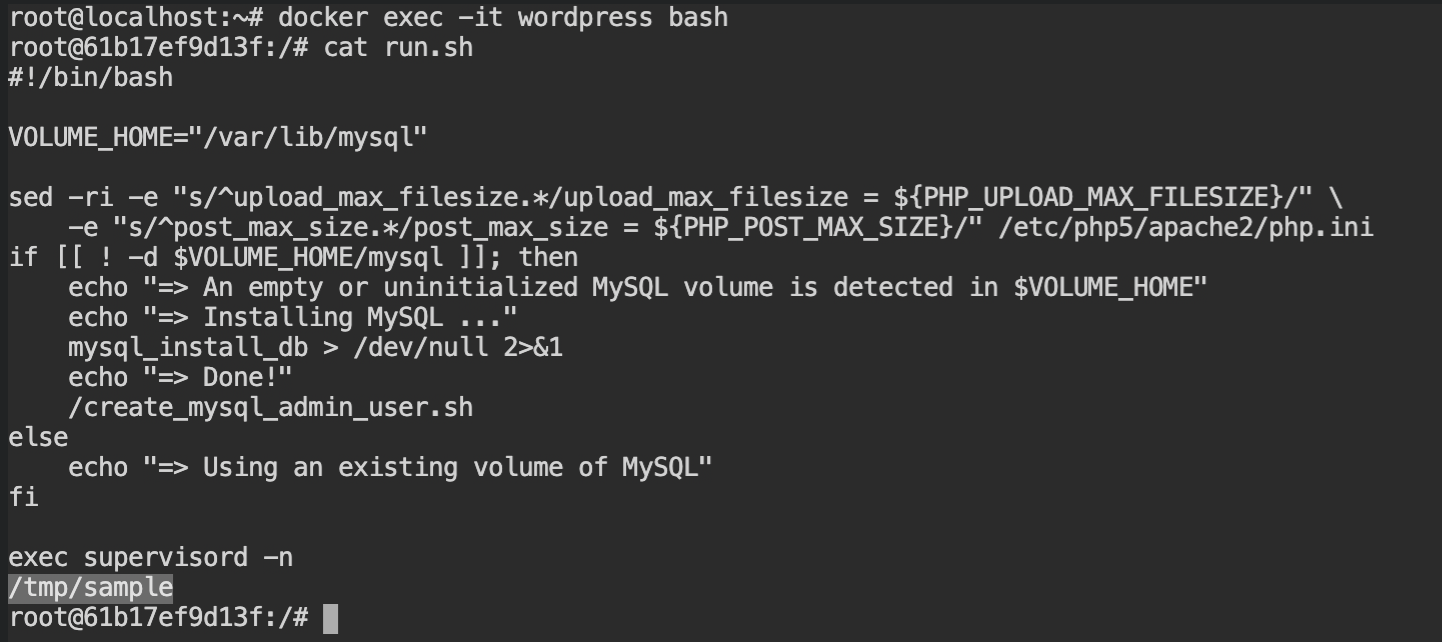
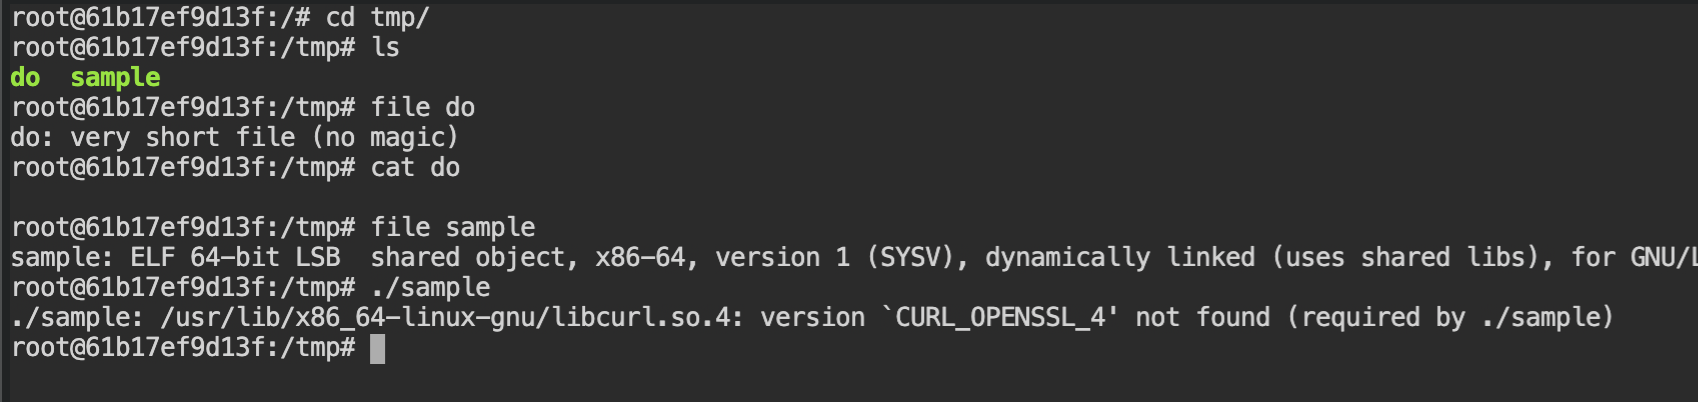
Using the knowledge from the previous lab to find the suspicious files. In this, we /tmp/do and /tmp/sample are the two files added and /run.sh file is changed. If you would see the container, it is the entry point of the container.
The malware could be added here so that when the container is restarted, it gets started automatically.
docker diffWell well! It is correct. As you can see there is a suspicious file at the last line and it is pointing to /tmp/sample. It is now confirmed that this is the entry point of the backdoor.
/tmp/sampleOn checking the file magic number, you will find that the /tmp/sample is the only executable file available. Because of the missing Curl library, it is not executing.
If you would recall the purpose of docker, is to share the packed application with others at no extra cost of resources. Therefore it does not have the curl library installed. In such cases, you can always copy files using docker cp command as shown below.

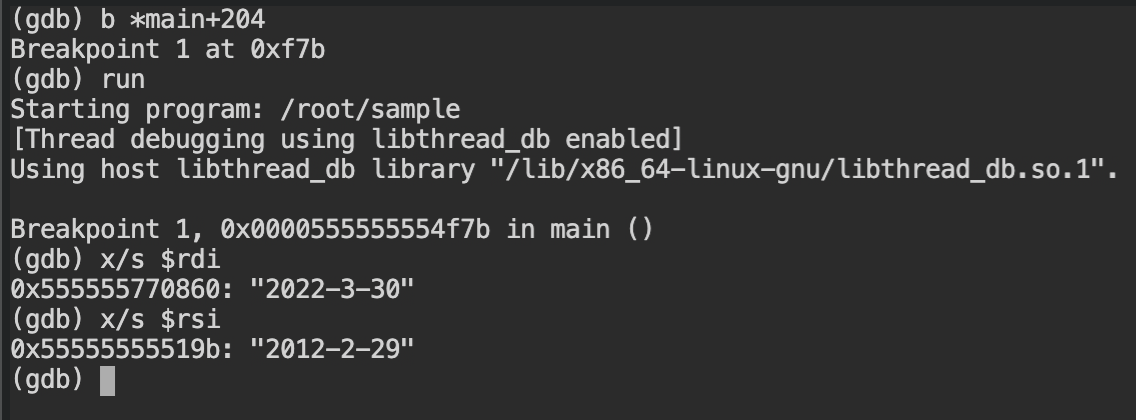
On running the program, it did not produce any output. To examine its working, here you need to have a basic understanding of gdb. Debug the code and you will find that there is a string compare function called.

Add the breaking point at that location and run the code. You will see that the source string is 2012-2-29 and the destination string is 2022-3-30. From this, we can understand that the current program is comparing the current system time with the one hardcoded in the source code.
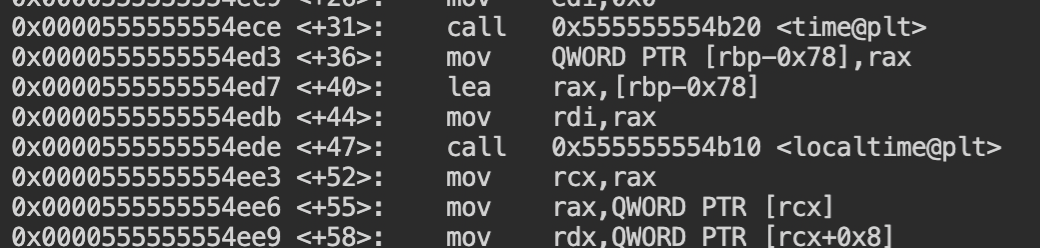
You can confirm this by disassembling the main function again and checking calls for time and localtime functions at the beginning of the program.
time and localtime functions to get the current system timeSet the time of the system using date command to the date required to run the program. You can use date +%y-%m-%d -s "20120229" command for this with the root user.
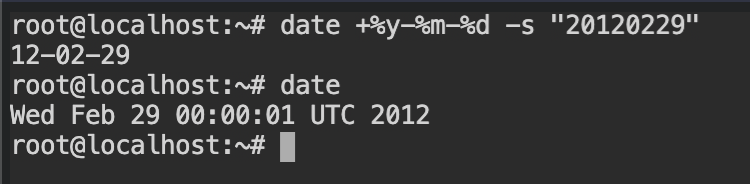
2012-02-29Run the sample binary again and now it will take some time to try to reach the remote server and then eventually fail to print the error message with the remote host.

Since the machine is not connected to the internet, it is unable to make the reach the DNS server.