Mitigating the Damage in the Compromised Webserver using AppArmor
In this post, you will get a very (very) detailed tutorial on how to confine the resource for an nginx server and the php fpm service on a compromised server to allow specific commands via webshell


What would happen if you are provided with a compromised target? Can you prevent unauthorized executions or eventually infrastructure takeover? Well, the answer to these questions is:– Yes, you can prevent such attacks by confining the resources that are not required for the process. In the post, I will discuss a lab from AttackDefense where you will get a compromised server with a webshell uploaded and I'll restrict the attacker to only execute date, ls /var/www/html and id command.
This post is going to be the lengthiest post ever so kindly bear with me :D
Getting Familiar with Webshell
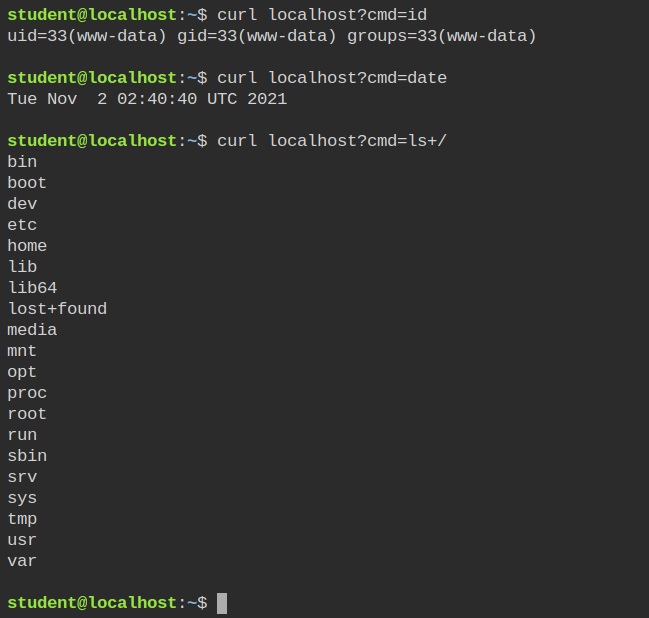
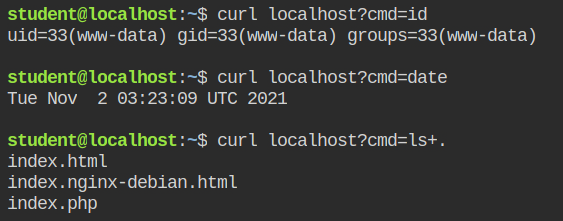
Let's start off by getting the list of open ports using netstat tool to get the port number of the web server and check the type of webserver.
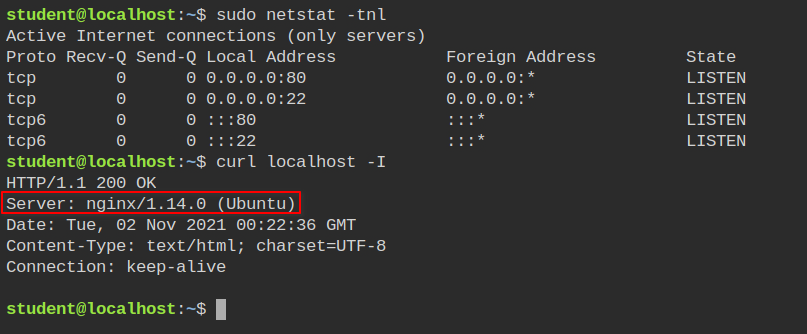
So the webserver we are dealing with is nginx. It will be required while creating the AppArmor profile. You can also see I can execute the commands using curl command.
Forget about piping tr command. I used it to replace \n with a space character.
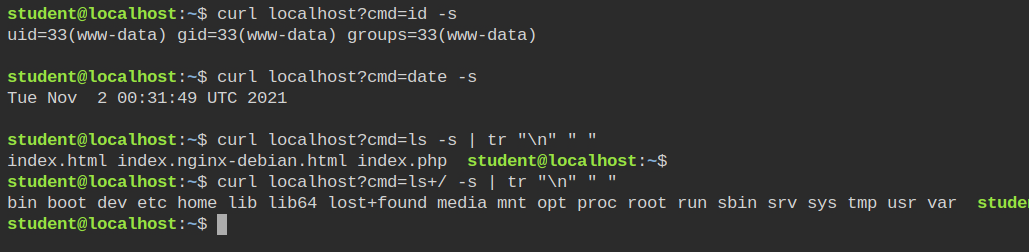
From the above output of the last command, you can see I can execute the ls command on the / directory. After completing certain steps demonstrated below, the attacker won't be able to execute the ls command on the root directory.
Setting up AppArmor Profile for Nginx
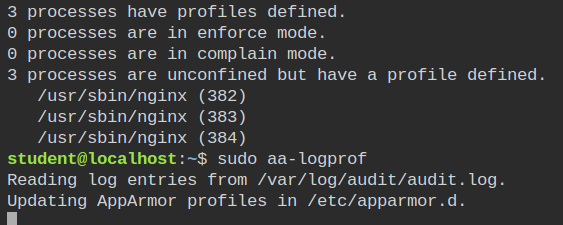
On checking the AppArmor profile status and filtering for nginx, I found nothing. This means there are no profiles created for the nginx. This is confirmed by running the aa-unconfined command which lists the processes running in unconfined mode

Since the server is already running you will not get the audit logs for AppArmor and aa-genprof will not work. So you can use the aa-autodep command with --no-reload property to create a basic template of nginx profile without loading it in the kernel
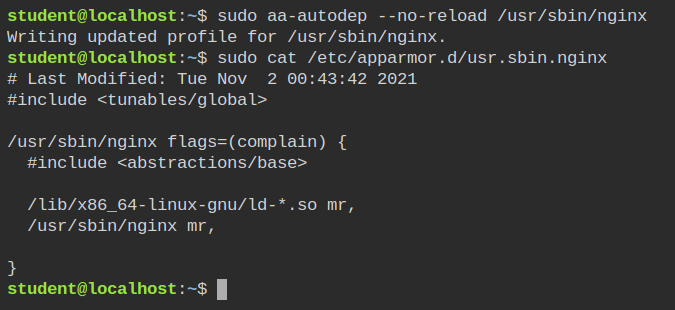
/usr/sbin/nginxYou will see the processes of nginx are now listed in the status command output. The next step is to keep aa-logprof running in your on terminal (browser tab in this case). It will read the /var/logs/audit/audit.log file for the current profile, parse the logs and give you further options to build the profile.
You can think of this like aa-genprof = aa-autodep + aa-logprof
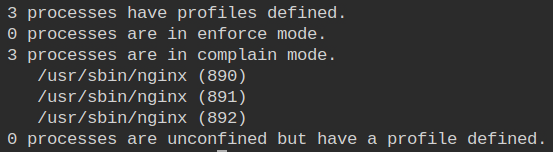
aa-logprof commandPut the nginx profile in complain mode and restart the service using /etc/init.d/nginx start with sudo.

Now the processes will run under complain mode and you can verify it by running aa-status command
This will result in adding data in the audit log file from where aa-logprof will give you an interface to select the appropriate options.
Selecting the Options for Nginx Profile
The very first entry is to allow cap_dac_override which is being used by the nginx process to write or read the log files because the nginx spawns workers with different user and group ids.

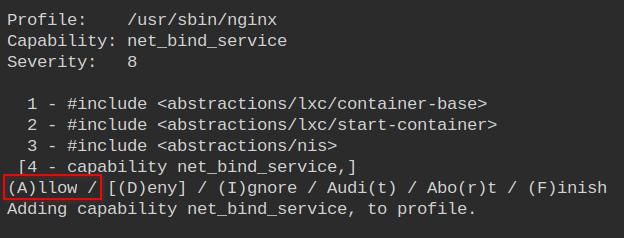
Allow the cap_bind_service to enable the nginx to open privileged ports like 80 and 443.
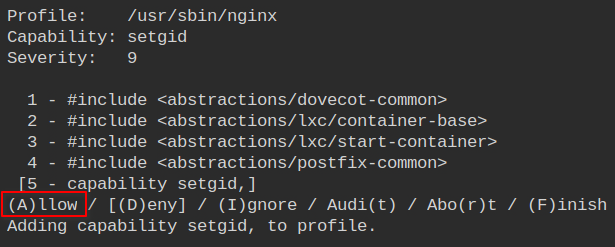
Allow the setgid capability used to change the group of the running workers.
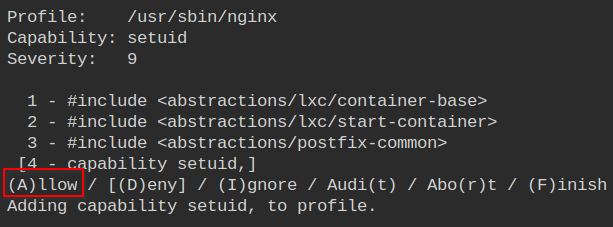
Allow the setuid capability used to change the group of the running worker.
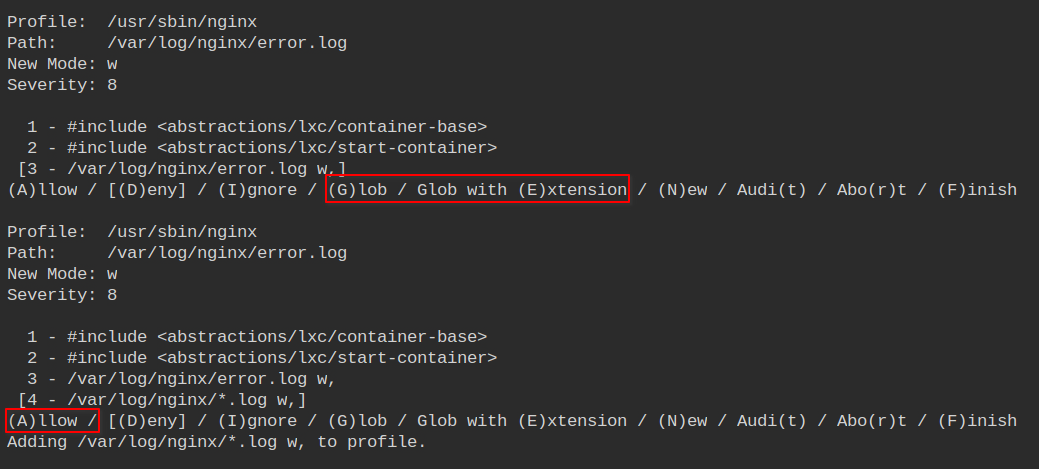
Allow nginx to perform write operations for all log files with glob pattern *.log in the nginx logs directory.
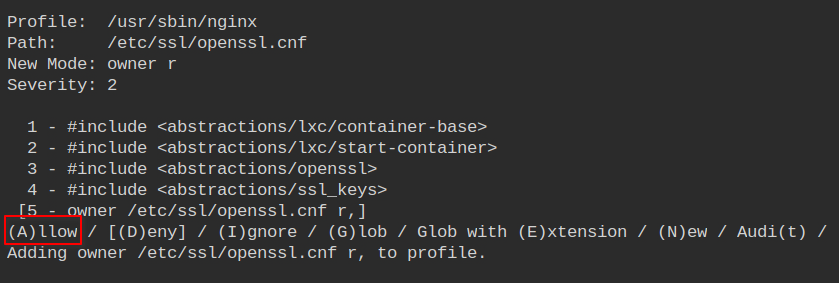
Allow nginx to read the OpenSSL master configuration file which can be used to set up SSL certificates
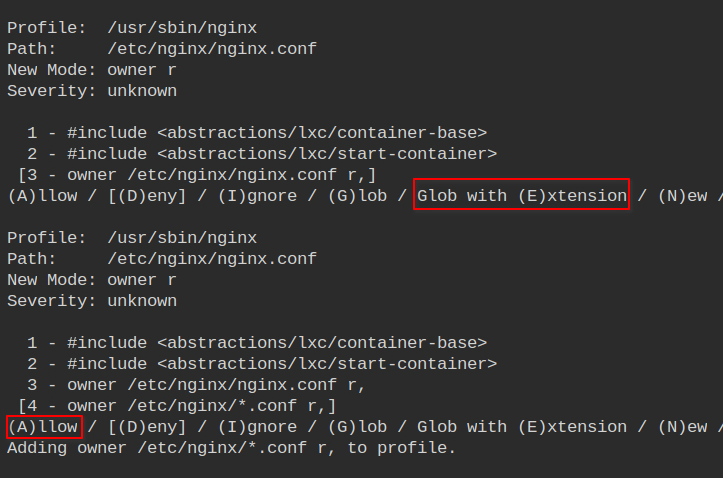
The nginx.conf the file is the main configuration file of nginx. It must be allowed to only the owner. Since /etc/nginx is home to all the nginx server related configurations, let's allow all the *.conf files in the directory
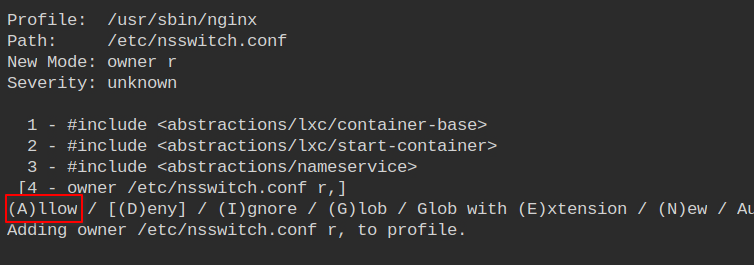
Allow owner read access to the nsswitch.conf file which is used for DNS resolution along with resolv.conf file
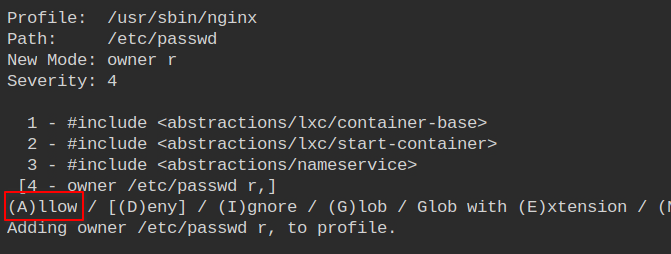
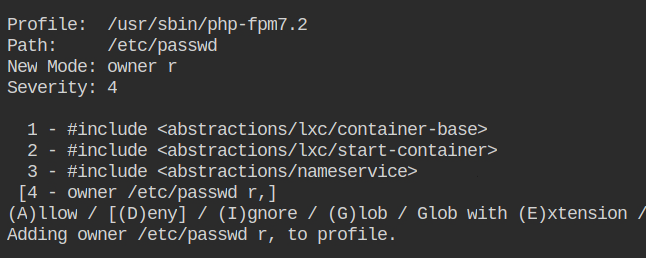
Allow owner read access to the /etc/passwd file which is used for resolving user ids from name and vice-versa
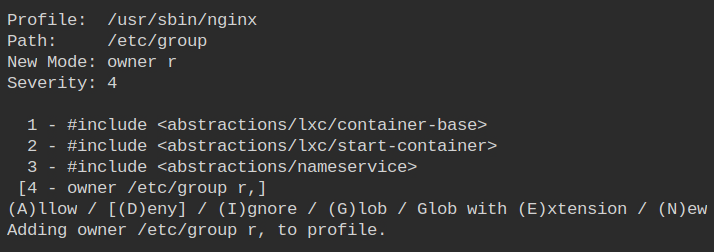
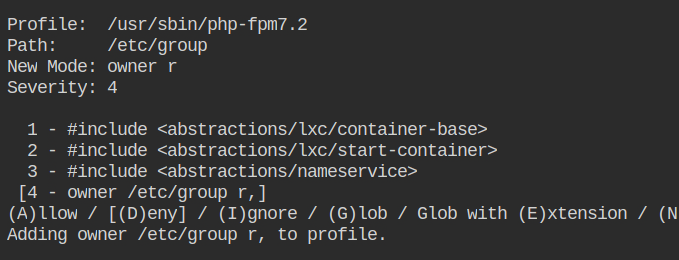
Allow owner read access to the /etc/group file which is used for resolving group ids from name and vice-versa
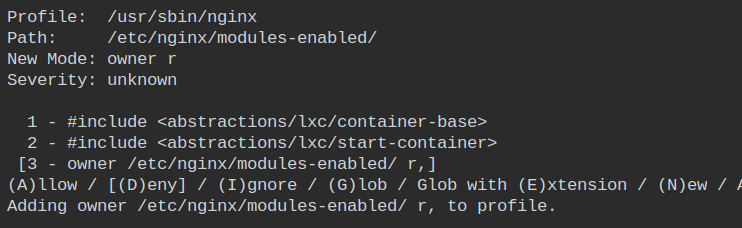
This directory is nginx related, so let's allow the access to /etc/nginx/modules-enabled/ which will be used by the nginx process to load third-party extensions.
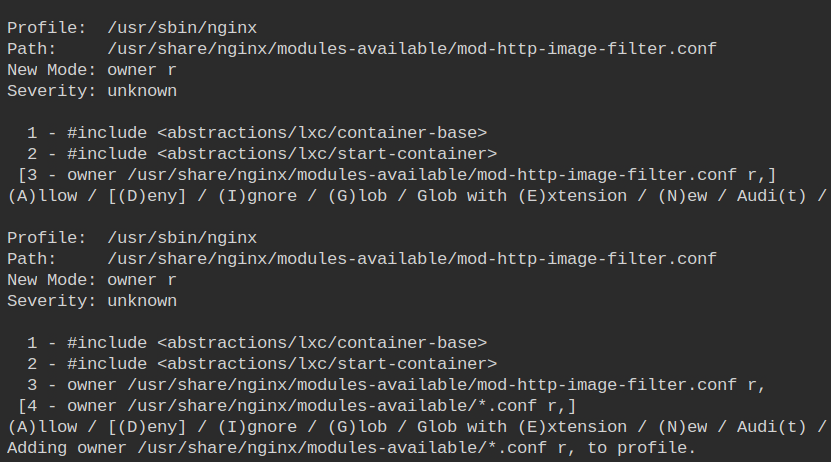
Allow owner read access to all the files ending with *.conf extension in /etc/nginx/modules-available/ directory. This contains a list of all the module configurations files which are available to be enabled + already enabled.
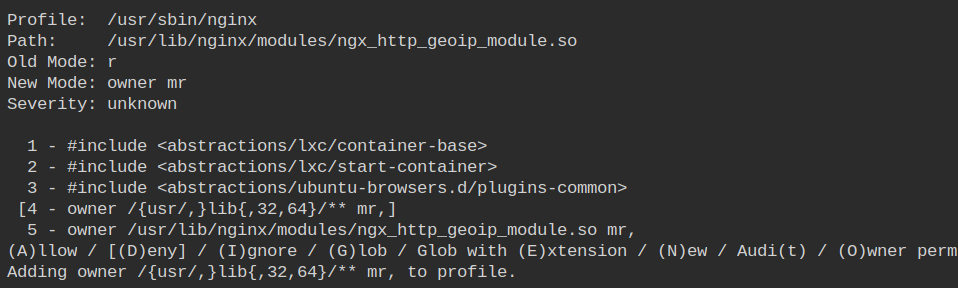
This directory actually contains the library which will be loaded into the memory. Thus owner's access to memory map and read is required.
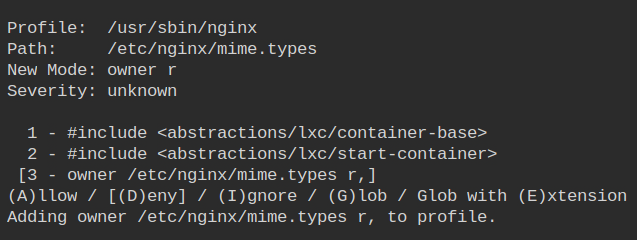
The /etc/nginx/mime.types file is used to map the content which appropriate Content-Type in the HTTP header. Owner read access to this file is also required.
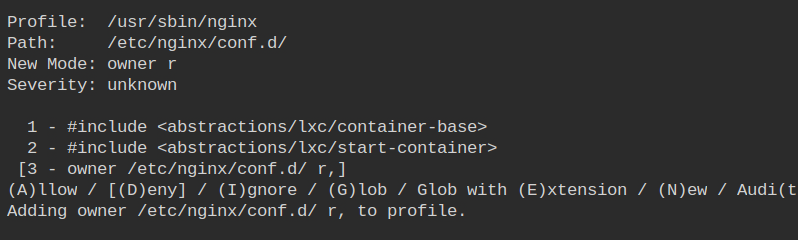
Nginx allows you to extend its configuration by adding upstreams or virtual hosts. Such configurations are usually stored in /etc/nginx/conf.d. To list the files owner read access is required.
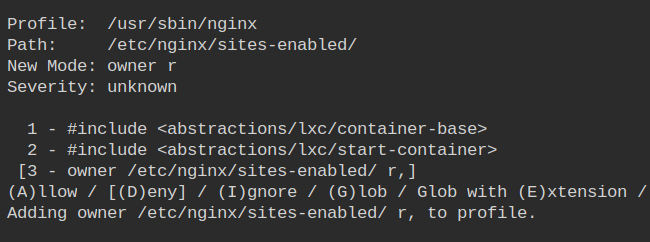
As I discussed earlier, sites-enabled is specifically used for symlinking the configurations from the sites-available directory which nginx will consider as enabled vhost.
By default, you will get a default vhost file that will listen on the loopback interface ( server_name _). Owner read access is required in this file.

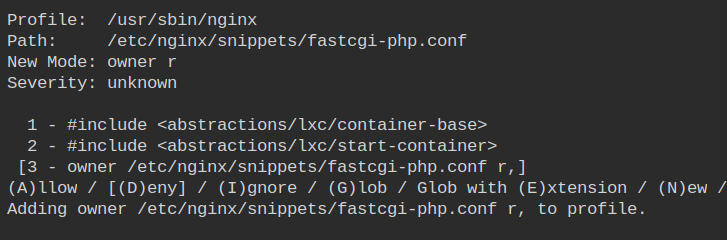
Since the PHP is running on the system and nginx doesn't have native support for PHP. So owner read access to the /etc/nginx/snippets/fastcgi-php.conf file is required which will contain the configuration to talk to FastCGI service.
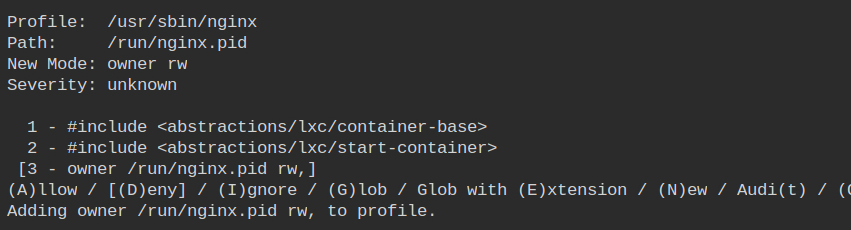
The PID file at /run/nginx.pid is required to lock the nginx processes and prevent it from opening the same port twice.
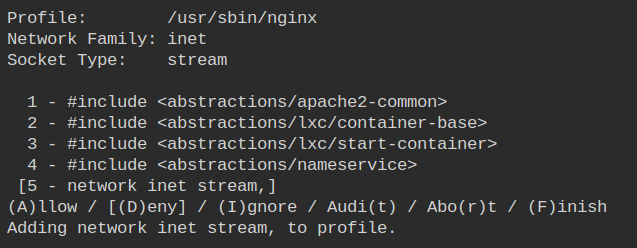
As you have seen I have been using the localhost to access the server. It is possible because nginx is allowed to perform socket specific operations on the IPv4 address family.
Similarly, allow the process to perform socket specific operations on the IPv6 address family. After you have done all this, it will prompt you to Save Changes. Press the S key and save the profile in /etc/apparmor.d/usr.sbin.nginx .

After this, you will get the following profile ready in the complain mode
#include <tunables/global>

/usr/sbin/nginx flags=(complain) {
  #include <abstractions/base>

  capability dac_override,
  capability net_bind_service,
  capability setgid,
  capability setuid,

  network inet stream,
  network inet6 stream,

  /lib/x86_64-linux-gnu/ld-*.so mr,
  /usr/sbin/nginx mr,
  /var/log/nginx/*.log w,
  owner /etc/group r,
  owner /etc/nginx/*.conf r,
  owner /etc/nginx/conf.d/ r,
  owner /etc/nginx/mime.types r,
  owner /etc/nginx/modules-enabled/ r,
  owner /etc/nginx/sites-available/default r,
  owner /etc/nginx/sites-enabled/ r,
  owner /etc/nginx/snippets/fastcgi-php.conf r,
  owner /etc/nsswitch.conf r,
  owner /etc/passwd r,
  owner /etc/ssl/openssl.cnf r,
  owner /run/nginx.pid rw,
  owner /usr/share/nginx/modules-available/*.conf r,
  owner /{usr/,}lib{,32,64}/** mr,
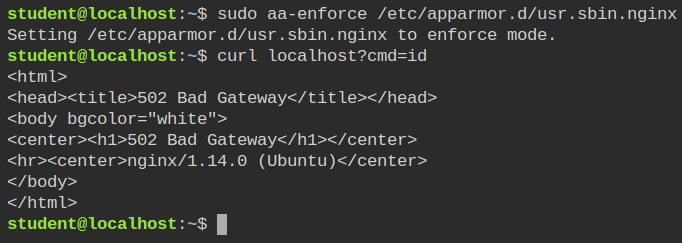
}aa-logprofAfter this, you need to enforce the profile into the kernel and try executing the command in the webshell. You will see the HTTP 502 error.
Fixing the Bad Gateway Error
So one thing I didn't set up is that NGINX use socket read-write operation to talk to php-fpm service. This is will be used to handle the requests made from clients to nginx and then to PHP service. Later PHP will generate a response and send it to the client in the reverse order. So to access PHP, owner read-write access is required on the /etc/php/php7.2-fpm.sock file.
Run the aa-logprof command again to allow this permission and save the changes in the profile.
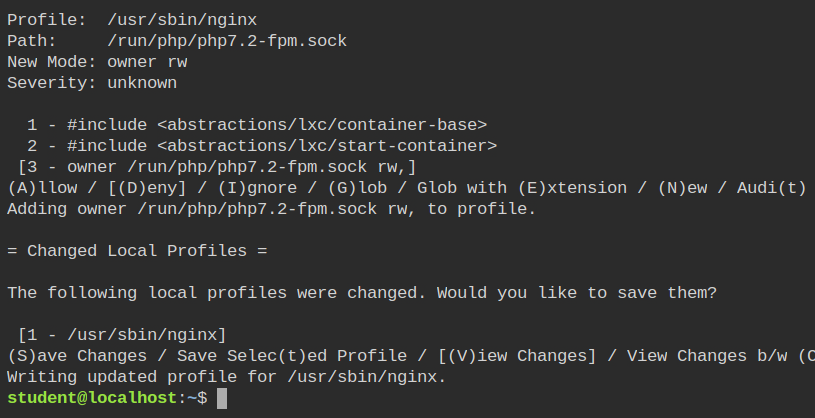
The following line will be added in the /etc/apparmor.d/usr.sbin.nginx profile and the profile will be automatically loaded into the kernel.
+ owner /run/php/php7.2-fpm.sock rw,This time you will have the webshell running. This is because the nginx is now allowed to communicate with the php service to carry out the execution. But wait! Why its executing ls in the root directory? That is because till now you have confined the nginx profile, not the php service.
Even from the audit log, you can see nginx is passing all the commands to the php fpm socket which means you have to now confine the php7.2-fpm service.

Setting up Profile for PHP-FPM Service
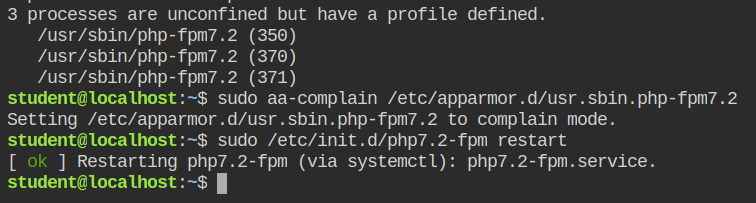
If you would run the aa-unconfined with the --paranoid argument, it will scan all the processes from the /proc. In this case, it is required because earlier that without "being paranoid" it didn't return all the processes.

/proc directoryLet's now create the minimal template for the command using aa-autodep command.
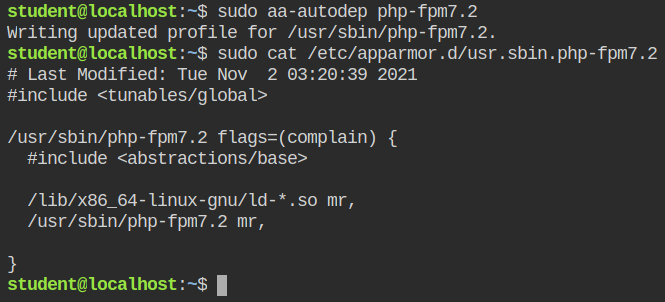
Put the profile in the complain mode and restart the service using /etc/init.d. You can also use systemctl. I am just being old school here.
Since the profile is in the complain mode, execute the three commands to generate audit logs.
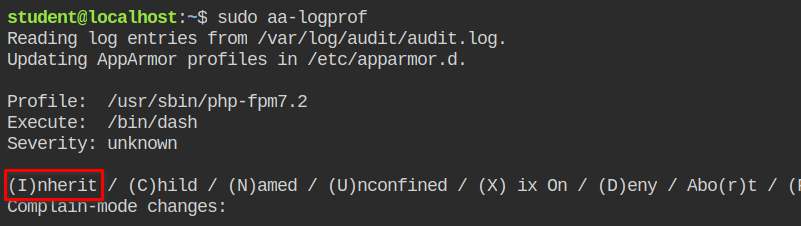
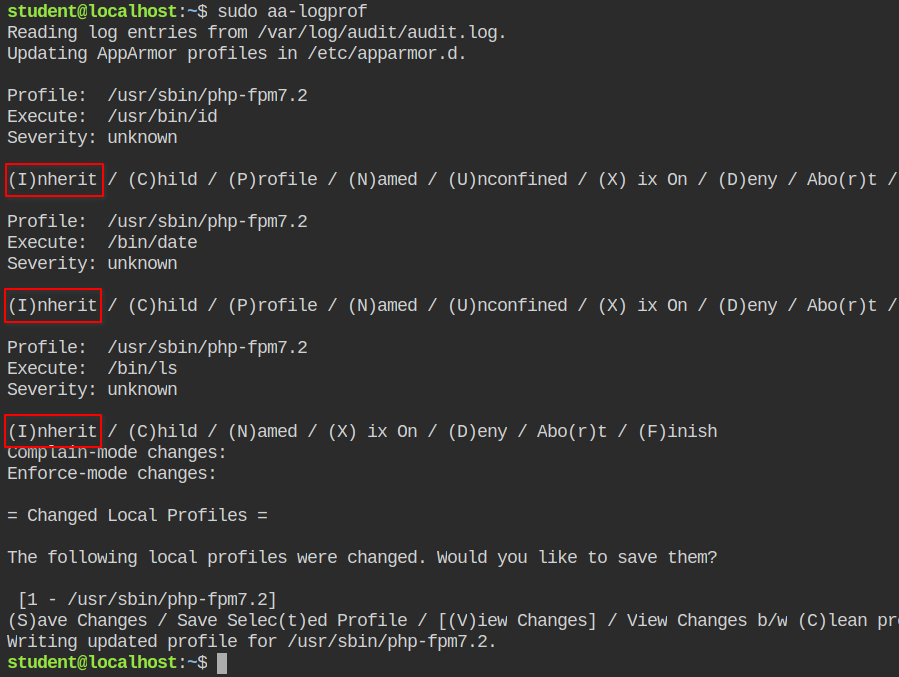
Execute aa-logprof and inherit the properties for /bin/dash which is being used to execute all the commands that you are passing in the cmd query parameter.
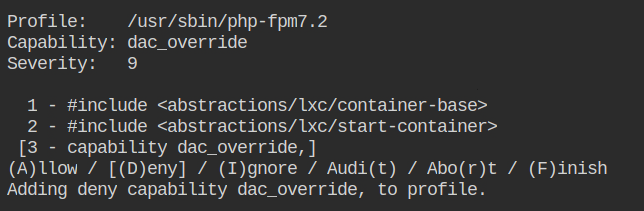
Deny the dac_override capability.
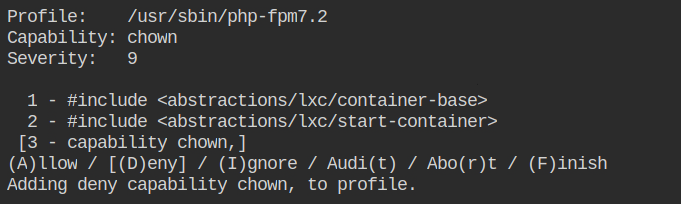
Deny the chown capability.
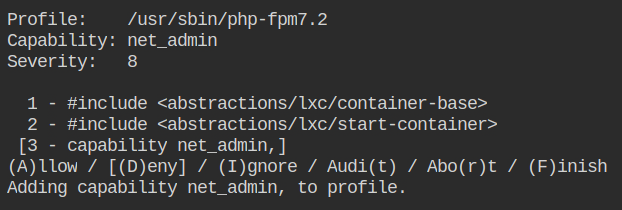
Allow the net_admin capability to bind to a privileged port. It is required to set up the TCP socket which is used by nginx.
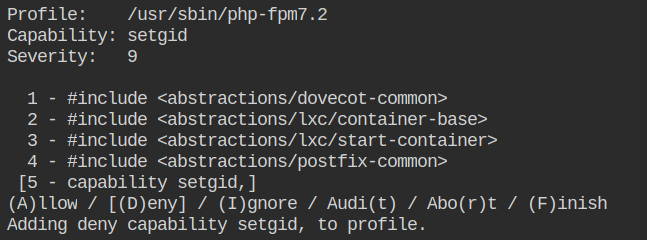
Deny the setgid capability.
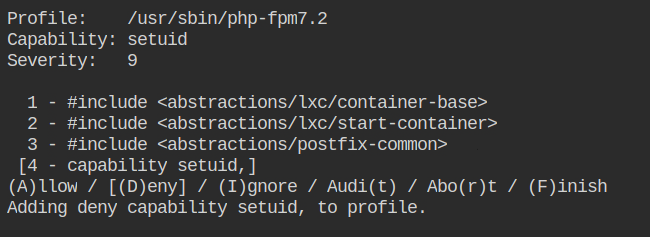
Deny the setuid capability.
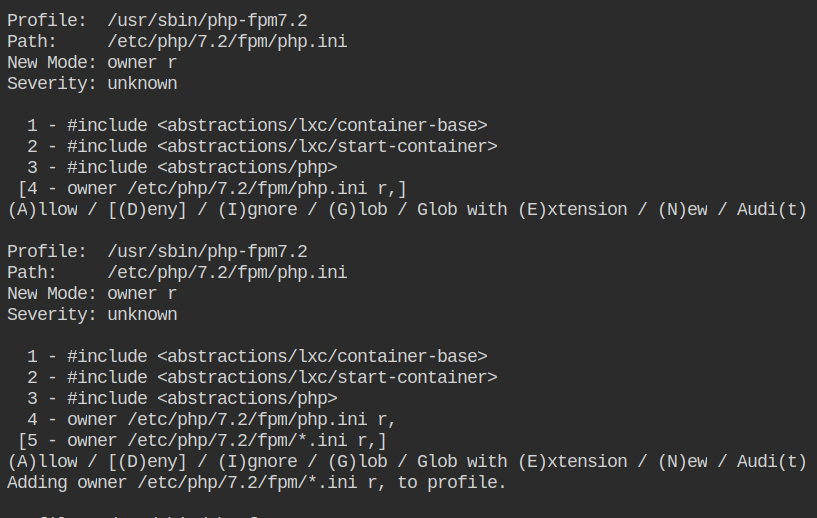
All the configurations for PHP FPM 7.2 are stored in /etc/php/7.2/fpm/*.ini. Owner read access is required.
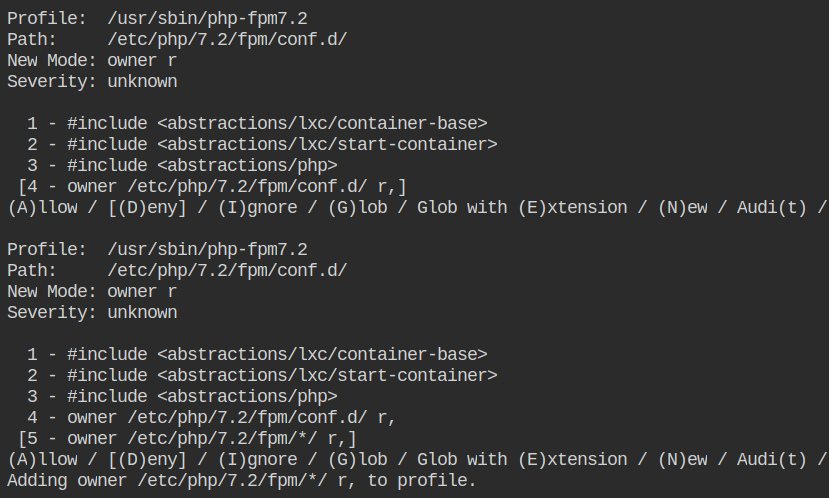
Allow the glob of all files in /etc/php/7.2/fpm/conf.d/ directory.
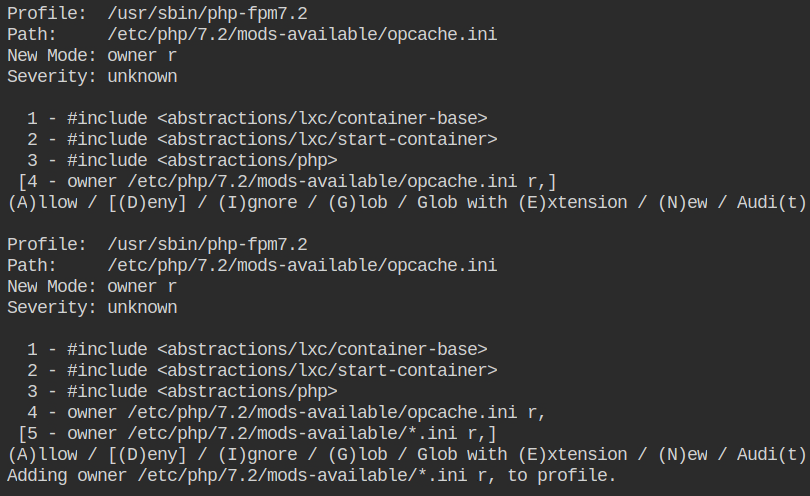
Allow owner read access to the /etc/php/7.2/mods-available/opcache.ini
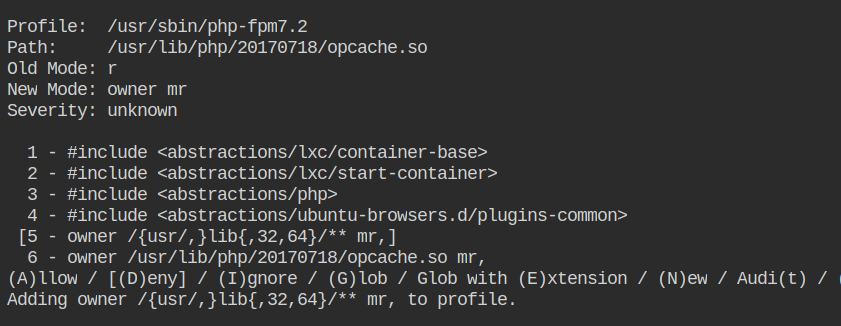
Allow the owner memory map and read access to all the files in /usr/lib, /usr/lib32, /usr/lib64, /lib, /lib32 and /lib64 directory recursively because it is a write-protected directory.
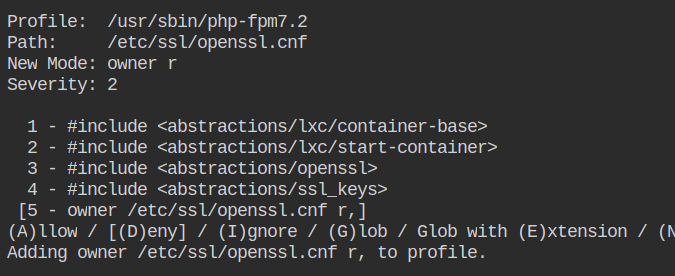
Allow owner read access to /etc/ssl/openssl.cnf file.
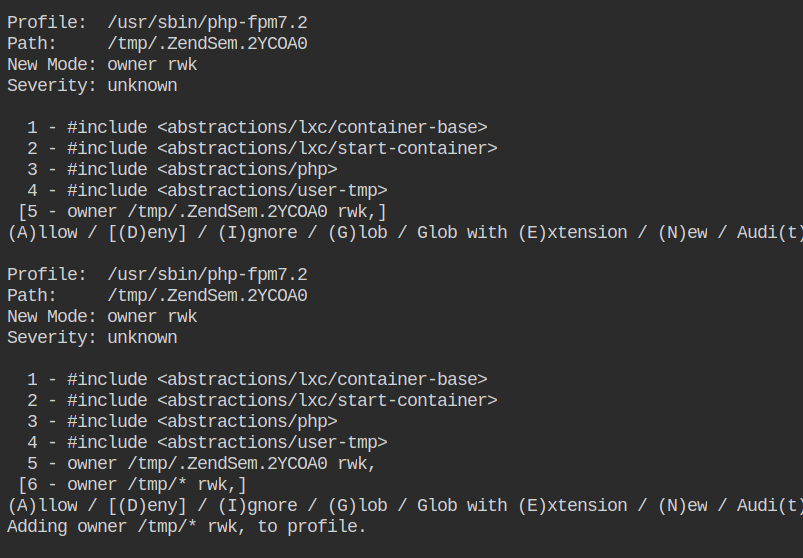
Allow access to all the files in the /tmp/ directory to read write and lock
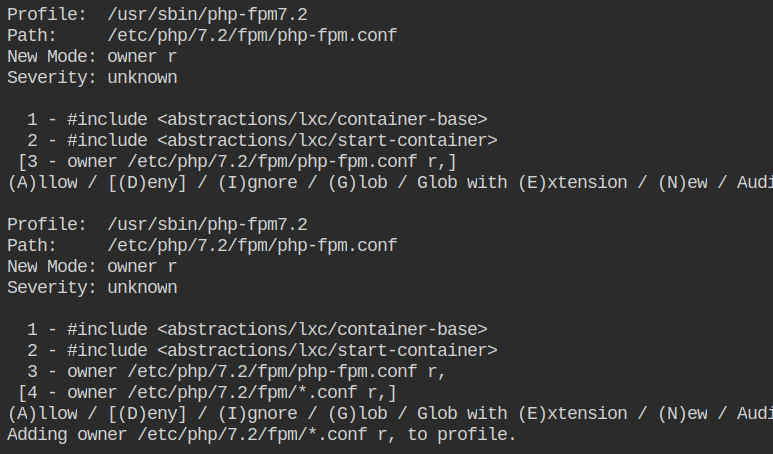
Allow the profile owner to read access to all the files matching the glob /etc/php/7.2/fpm/*.conf
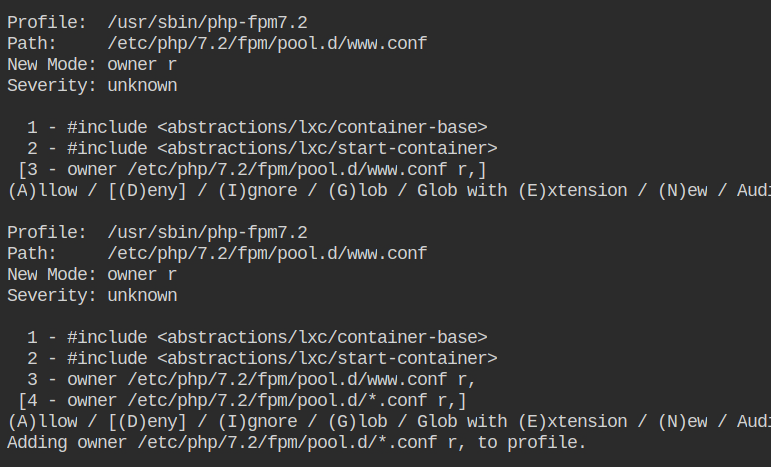
Allow the profile owner to read access to all the files matching the glob /etc/php/7.2/fpm/pool.d/*.conf
Allow owner write access to the /var/log/php7.2-fpm.log file

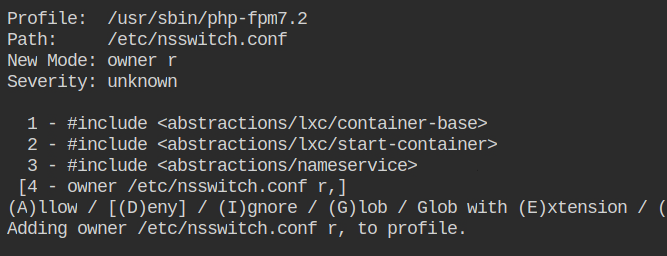
Allow the profile owner to read access to the /etc/nsswitch.conf file.
Allow owner read access to the /etc/passwd file.
Allow owner read access to the /etc/group file.
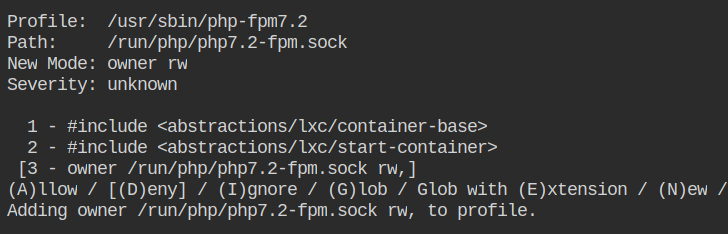
Allow owner read and write access to the /run/php/php7.2-fpm.sock file which will be used to respond back to the request made by nginx.
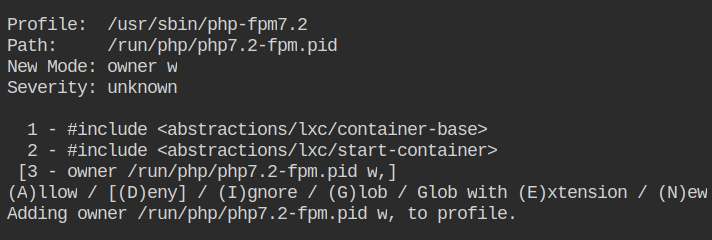
Allow owner write access to the /run/php/php7.2-fpm.pid file
Allow owner write access to the /run/systemd/notify file.
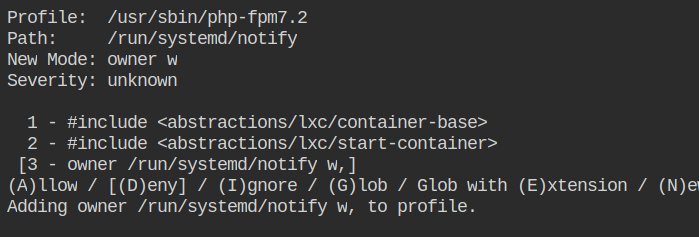
Lastly, allow the read access to the php source code located at /var/www/index.php and save the profile.
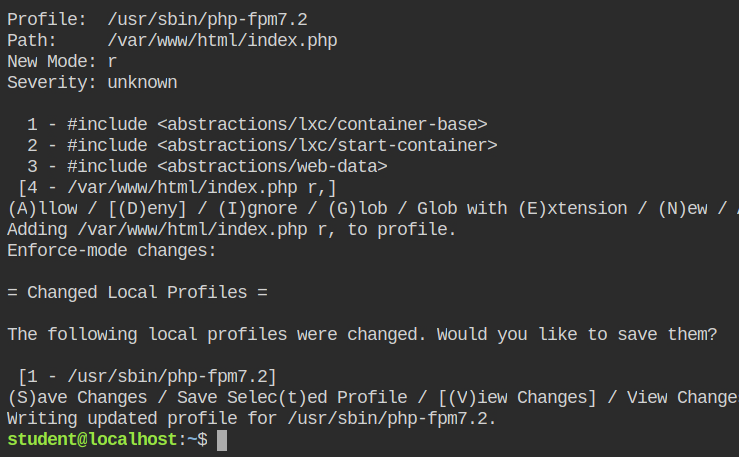
After all this, you will get a profile that looks like the following. You can use it to verify your steps
#include <tunables/global>
/usr/sbin/php-fpm7.2 flags=(complain) {
#include <abstractions/base>
deny capability chown,
deny capability dac_override,
deny capability setgid,
deny capability setuid,
capability net_admin,
/bin/dash mrix,
/lib/x86_64-linux-gnu/ld-*.so mr,
/usr/sbin/php-fpm7.2 mr,
/var/www/html/index.php r,
owner /etc/group r,
owner /etc/nsswitch.conf r,
owner /etc/passwd r,
owner /etc/php/7.2/fpm/*.conf r,
owner /etc/php/7.2/fpm/*.ini r,
owner /etc/php/7.2/fpm/*/ r,
owner /etc/php/7.2/fpm/pool.d/*.conf r,
owner /etc/php/7.2/mods-available/*.ini r,
owner /etc/ssl/openssl.cnf r,
owner /run/php/php7.2-fpm.pid w,
owner /run/php/php7.2-fpm.sock rw,
owner /run/systemd/notify w,
owner /tmp/* rwk,
owner /var/log/php7.2-fpm.log w,
owner /{usr/,}lib{,32,64}/** mr,
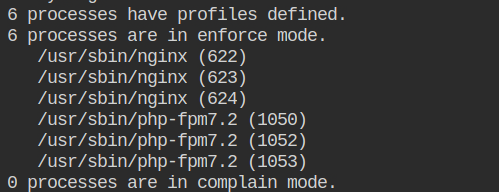
}After this put the profile on the enforce mode and check the status using aa-status command
Allow PHP-FPM to Execute the id, date and ls Commands Only
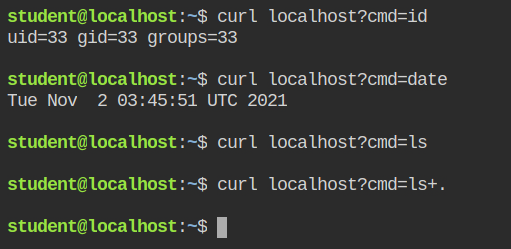
If you would execute the commands now, it will not execute them because by default AppArmor denies all the access. You have to whitelist them to use.
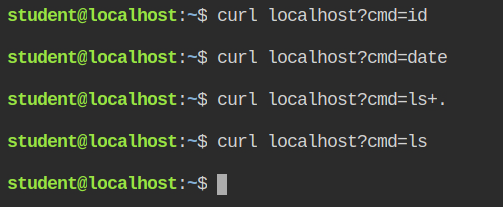
Since the profile is in enforce mode, it will also log the violations in the audit log file. You can use the aa-logprof command to parse the file and generate the profile for usr.sbin.php-fpm7.2. Inherit all the properties for id, date and ls command. Once this is done, save the profile.
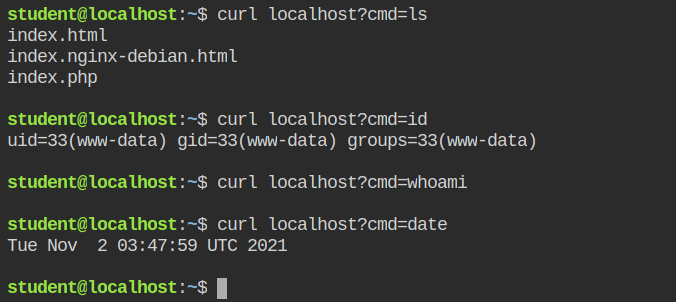
This will now execute id and date command successfully but not the ls command, that is because the command required "read" access in the directory and you are supposed to add the entry in the profile.
You can whitelist only the /var/www/html/ directory and save the profile. This will prevent ls from reading other directories.
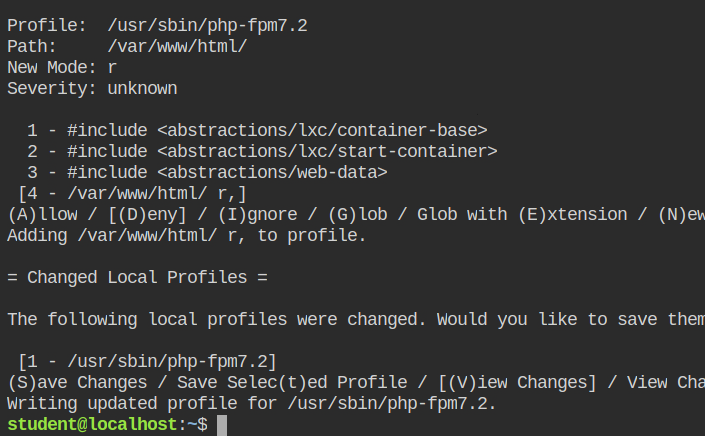
ls commandYou will see the following content added to the php fpm profile in /etc/apparmor.d/usr.sbin.php-fpm7.2 file after executing the above aa-logprof commands.
+ /bin/date mrix,
+ /bin/ls mrix,
+ /usr/bin/id mrix,
+ /var/www/html/ r,
Finally, you have confined both nginx and php services from accessing sensitive information on the server. Now pat your back as you leveled up in securing your systems from unauthorized access
References
- https://tbhaxor.com/linux-privilege-escalation/
- https://stackoverflow.com/questions/43467670/which-capabilities-can-i-drop-in-a-docker-nginx-container
- https://tbhaxor.com/understanding-linux-capabilities/
- https://www.redhat.com/en/blog/secure-your-containers-one-weird-trick
- https://serverfault.com/questions/776940/does-nginx-really-need-dac-override-in-its-apparmor-policy
- https://firejail.wordpress.com/documentation-2/linux-capabilities-guide/
- https://serverfault.com/questions/588770/why-can-nginx-access-etc-passwd
- https://networkengineering.stackexchange.com/questions/52116/whats-the-meaning-of-inet-and-inet6