Secure the Docker Registry with Password and TLS Certificates
Learn how to use the official image to create a private docker registry, then protect it with TLS certificates and HTTP Basic authentication.


Hello World! So far I have talked more about exploiting misconfigurations in the docker environment. So let's balance it with some of my defensive tutorials. In this post, I will be discussing with you how to set up a private docker registry for your organization. I will go a step ahead and discuss how to set up a password and TLS certificates for secure communications.
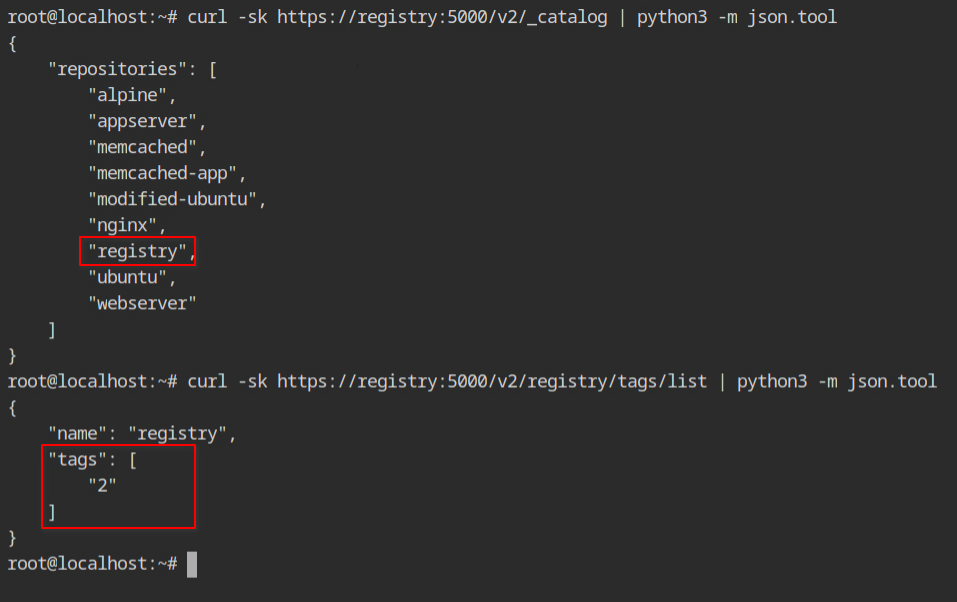
The lab I will be using is provided by AttackDefense Labs which is service the docker registry at https://registry:5000 and contains the image of the registry with only the tag available.
Pull the repository from the remote registry to the local file system docker pull command as shown below. Recall that by default the command will try to pull the registry from the http://hub.docker.com/ registry. You can explicitly pass the hostname and port number of the private docker registry.
docker pull registry:5000/registry:2Once it is downloaded, you can start the registry using the command in the following pic. By default, the registry will run on 5000 port, so let's forward it to the localhost using -p 5000:5000 and bind mount the artefacts of the image from into /tmp directory using -v /tmp:/var/lib/registry.
After the command is executed successfully, you can try to interact using the curl command. Since this is a fresh installation, you won't see any image name in the repository catalogue.

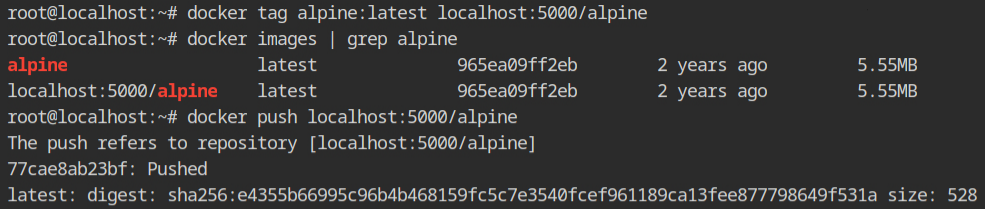
To push the docker image on the different registry, it should be in the same format as while pulling the command. Yeah, you can say it by cloning the docker image with a different name. This can be done by using the docker tag command, which accepts the source image reference and new image reference.
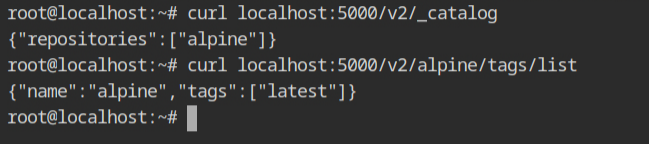
Once the push is done, this time when you will query the catalogue and the tags, it will give you the following output.
Securing the Registry Server
Till now what you can have seen is how to run your own private docker registry by pulling the registry image provided by the docker team. Luckily they have also provided some best practices and tutorials on how to secure it with HTTP Basic Authentication and TLS certificates so that your plain HTTP credentials should flow via a network in the encrypted form.
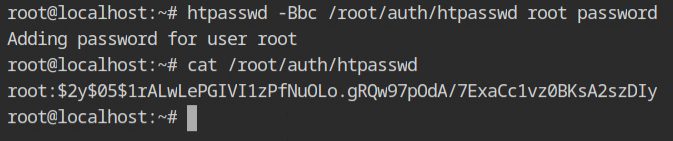
I will be using HTTP's Native Authentication which uses the bcrypt algorithm for hashing. You can use the htpasswd command to create the password using Bcrypt (-B) and MD5 algorithm (-m) options.
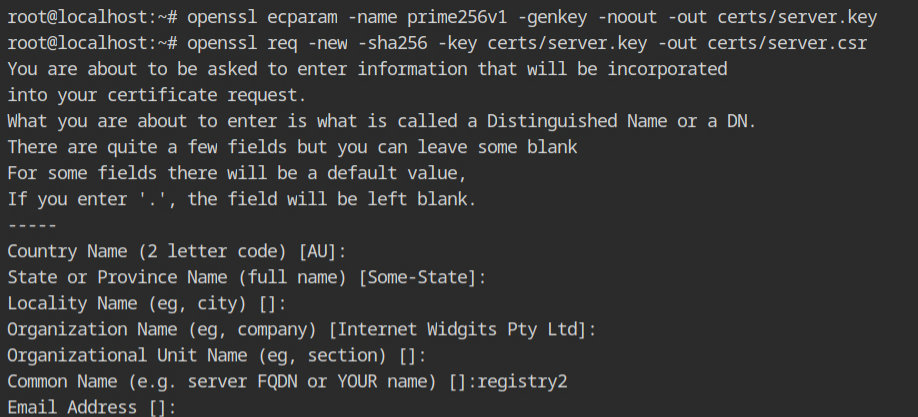
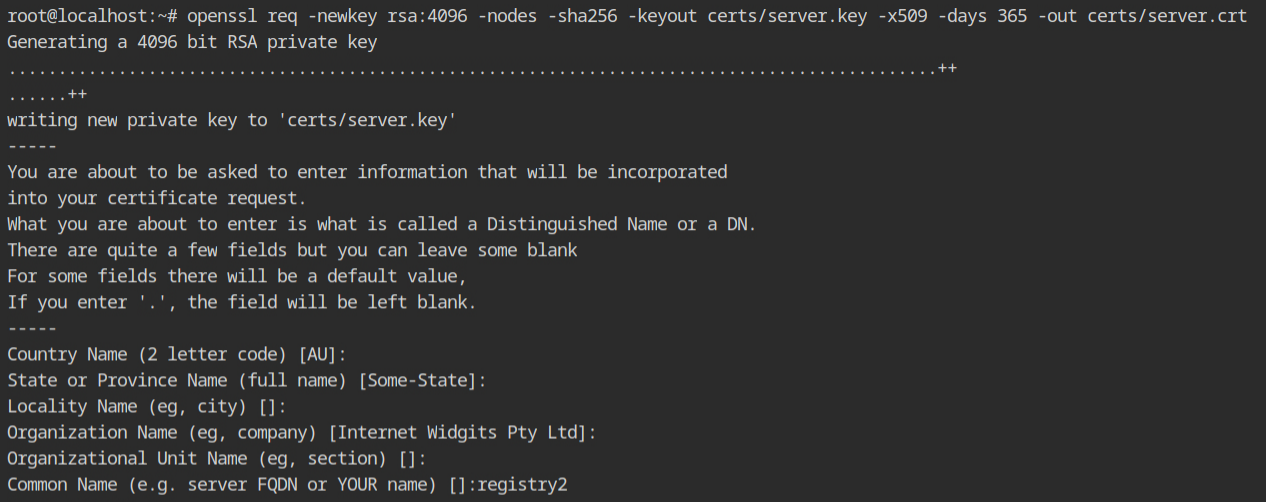
Now it's time to create the encryption keys and self-signed certificates from that key. When it will ask for the FQDN, enter any value otherwise it will not work. In this case, have mapped localhost with registry2, therefore using that value.
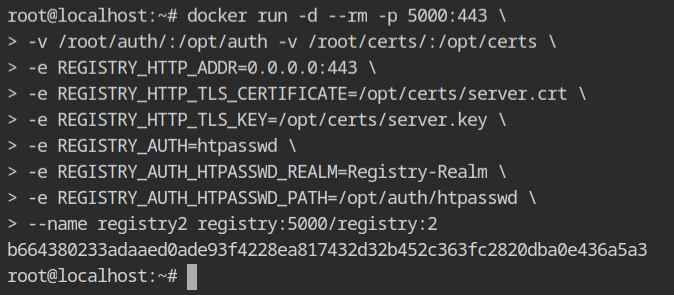
Once you are finished with creating the certificates, start the docker container with the following configurations to map the TLS and password files using bind mount and provide environment variables which will be read by the
REGISTRY_HTTP_ADDR– The default port of HTTPS is 443 and to expose the port, it is required to listen on all interfaces.REGISTRY_HTTP_TLS_CERTIFICATE– Path of the .crt file in the context of the container. This will be from the bind mount/opt/certs/server.crtfile.REGISTRY_HTTP_TLS_KEY– Path of the .key file from/opt/certs/server.key.REGISTRY_AUTH– This will be the type of authentication you want to set up. In this case, it should be set tohtpasswd.REGISTRY_HTTP_HTPASSWD_REALM– In the basic authentication REALM is nothing, but a protection space which could be any arbitrary string for the authenticator to understand the type of authentication. For more information read this answer on the StackOverflow community.REGISTRY_HTTP_HTPASSWD_PATH– Provide the file that contains all the usernames and passwords in the/opt/auth/htpasswdfile.
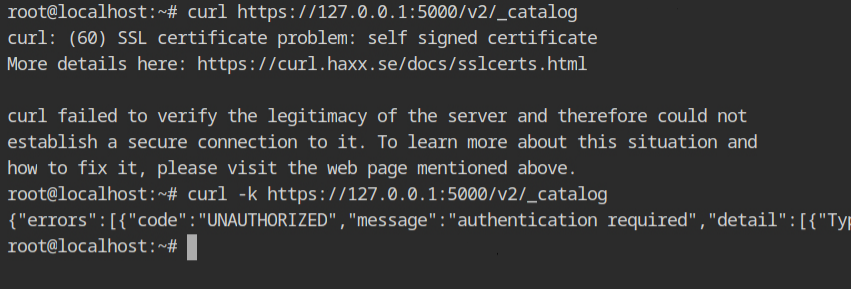
When you try to use the https:// scheme once the container is deployed, you'll get an error saying that the self-signed certificate could not be confirmed. If you try the same curl request with the -k option (to enable insecure connections) and get an UNAUTHORIZED error, TLS is installed correctly.
Since the curl couldn't locate any certificate to handle the encryption/decryption from the server, it failed by default.
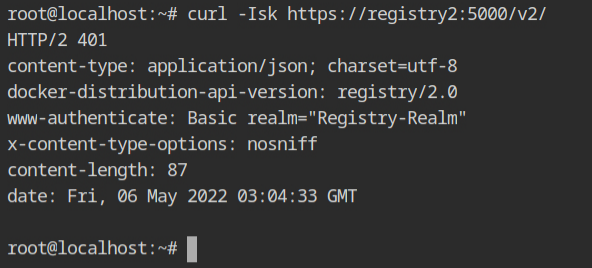
You can use the -I parameter, which is a shorthand for -X HEAD, to receive only the headers on the curl request, to test the authentication. The 401 HTTP status indicates that the resource is protected and uses the Basic authentication mechanism.
Use the root:password credentials with the -u parameter to submit these with the curl request. This time, the JSON output verifies that both TLS and HTTP authentication is operating properly.

Resources
- https://medium.com/@ifeanyiigili/how-to-setup-a-private-docker-registry-with-a-self-sign-certificate-43a7407a1613
- https://docs.docker.com/registry/deploying/
- https://gist.github.com/Soarez/9688998
- https://hub.docker.com/_/registry
- https://crypto.stackexchange.com/a/43700
- https://tbhaxor.com/exploiting-insecure-docker-registry/
- https://tbhaxor.com/interacting-protected-docker-registry/
- https://docs.docker.com/engine/reference/commandline/pull/#pull-from-a-different-registry
- https://docs.docker.com/engine/reference/commandline/tag/#tag-an-image-for-a-private-repository
- https://docs.docker.com/registry/recipes/apache/
- https://docs.docker.com/registry/recipes/nginx/
- https://datatracker.ietf.org/doc/html/rfc7235#section-2.2
- https://stackoverflow.com/a/12701105/10362396